Multi-vendor capabilities are only available in Spree Enterprise Edition.
Vendor List Overview
The main table displays every vendor on your marketplace alongside key metrics and status indicators.
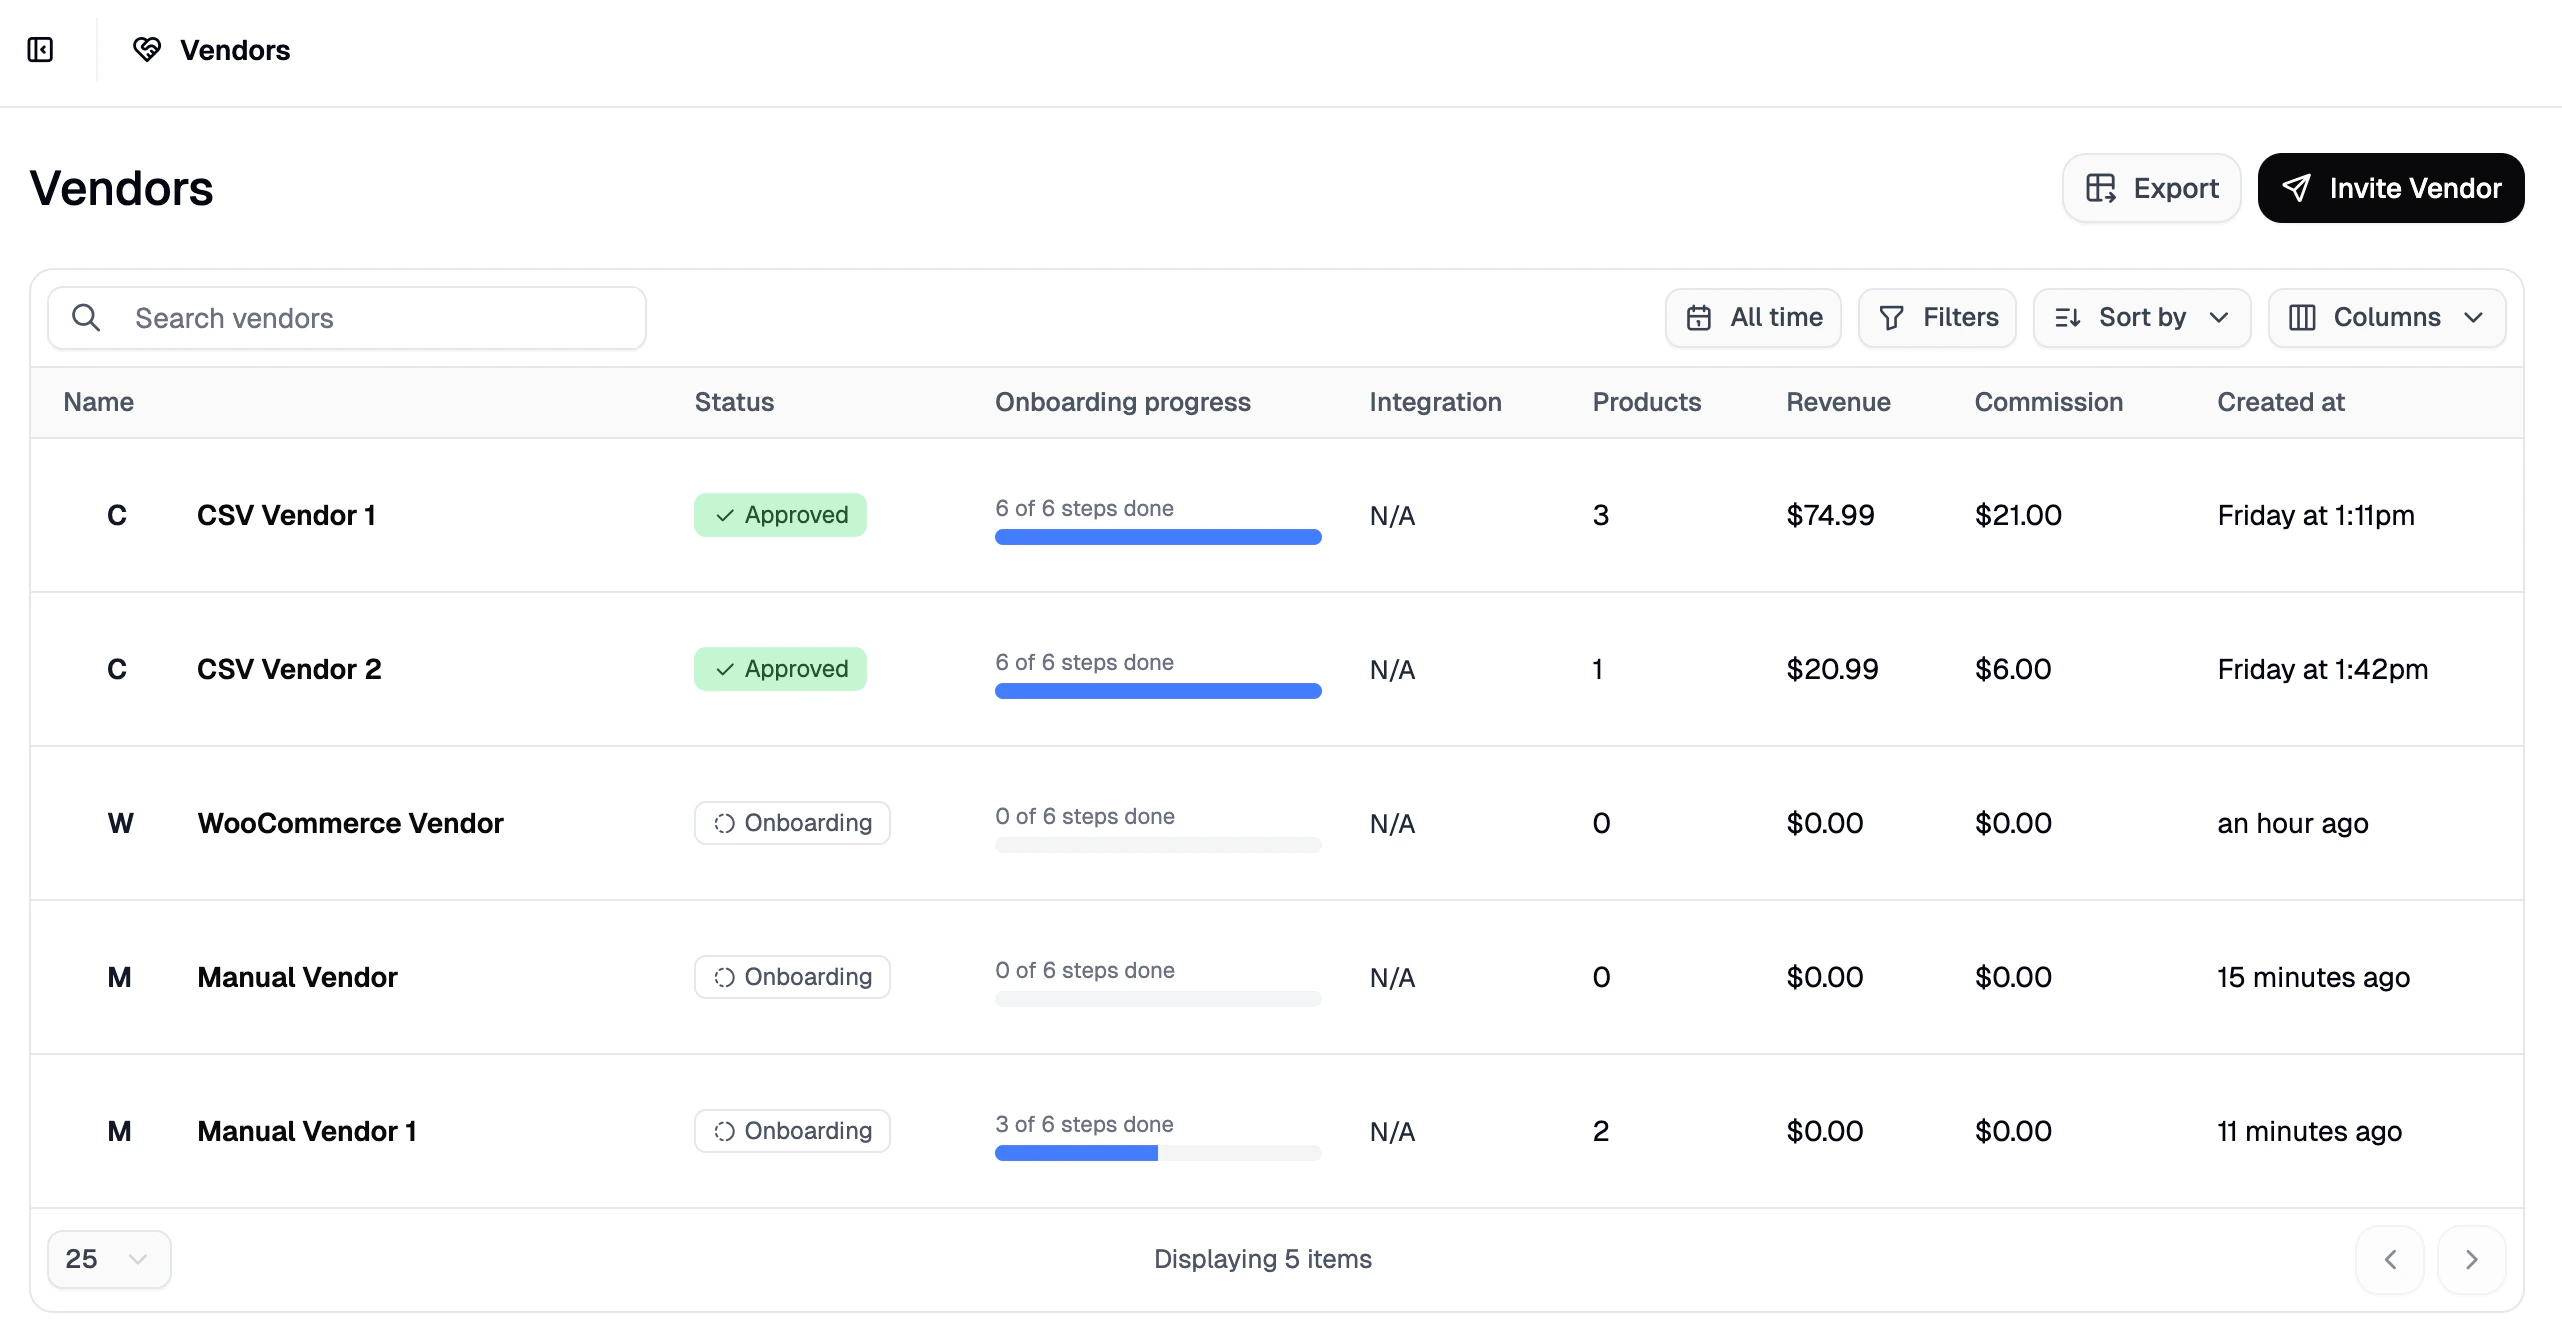 The default columns are:
- Name - the vendor’s brand or company name.
- Status - the current state of the vendor relationship:
- Invited - invitation sent, not yet accepted.
- Onboarding - vendor is working through onboarding tasks.
- Ready for Review - vendor has completed onboarding and is awaiting your approval.
- Approved - vendor is live and selling on the marketplace.
- Rejected - vendor was not approved during review.
- Suspended - vendor’s access has been temporarily revoked.
- Onboarding Progress - a count of completed onboarding tasks (e.g., 4/6).
- Integration - the vendor’s connection type:
- Shopify
- WooCommerce
- N/A (Manual/CSV vendors)
- Products - total number of products in the vendor’s catalog.
- Revenue - lifetime sales generated by the vendor.
- Commission - lifetime commission your marketplace has earned from the vendor.
- Created At - when the vendor was first invited.
From this view you can apply filters, sort by any column, customize the visible columns, and export the data by clicking Export in the top right corner.
Managing a Vendor
To manage a specific vendor, click their row in the table to open their full vendor profile.
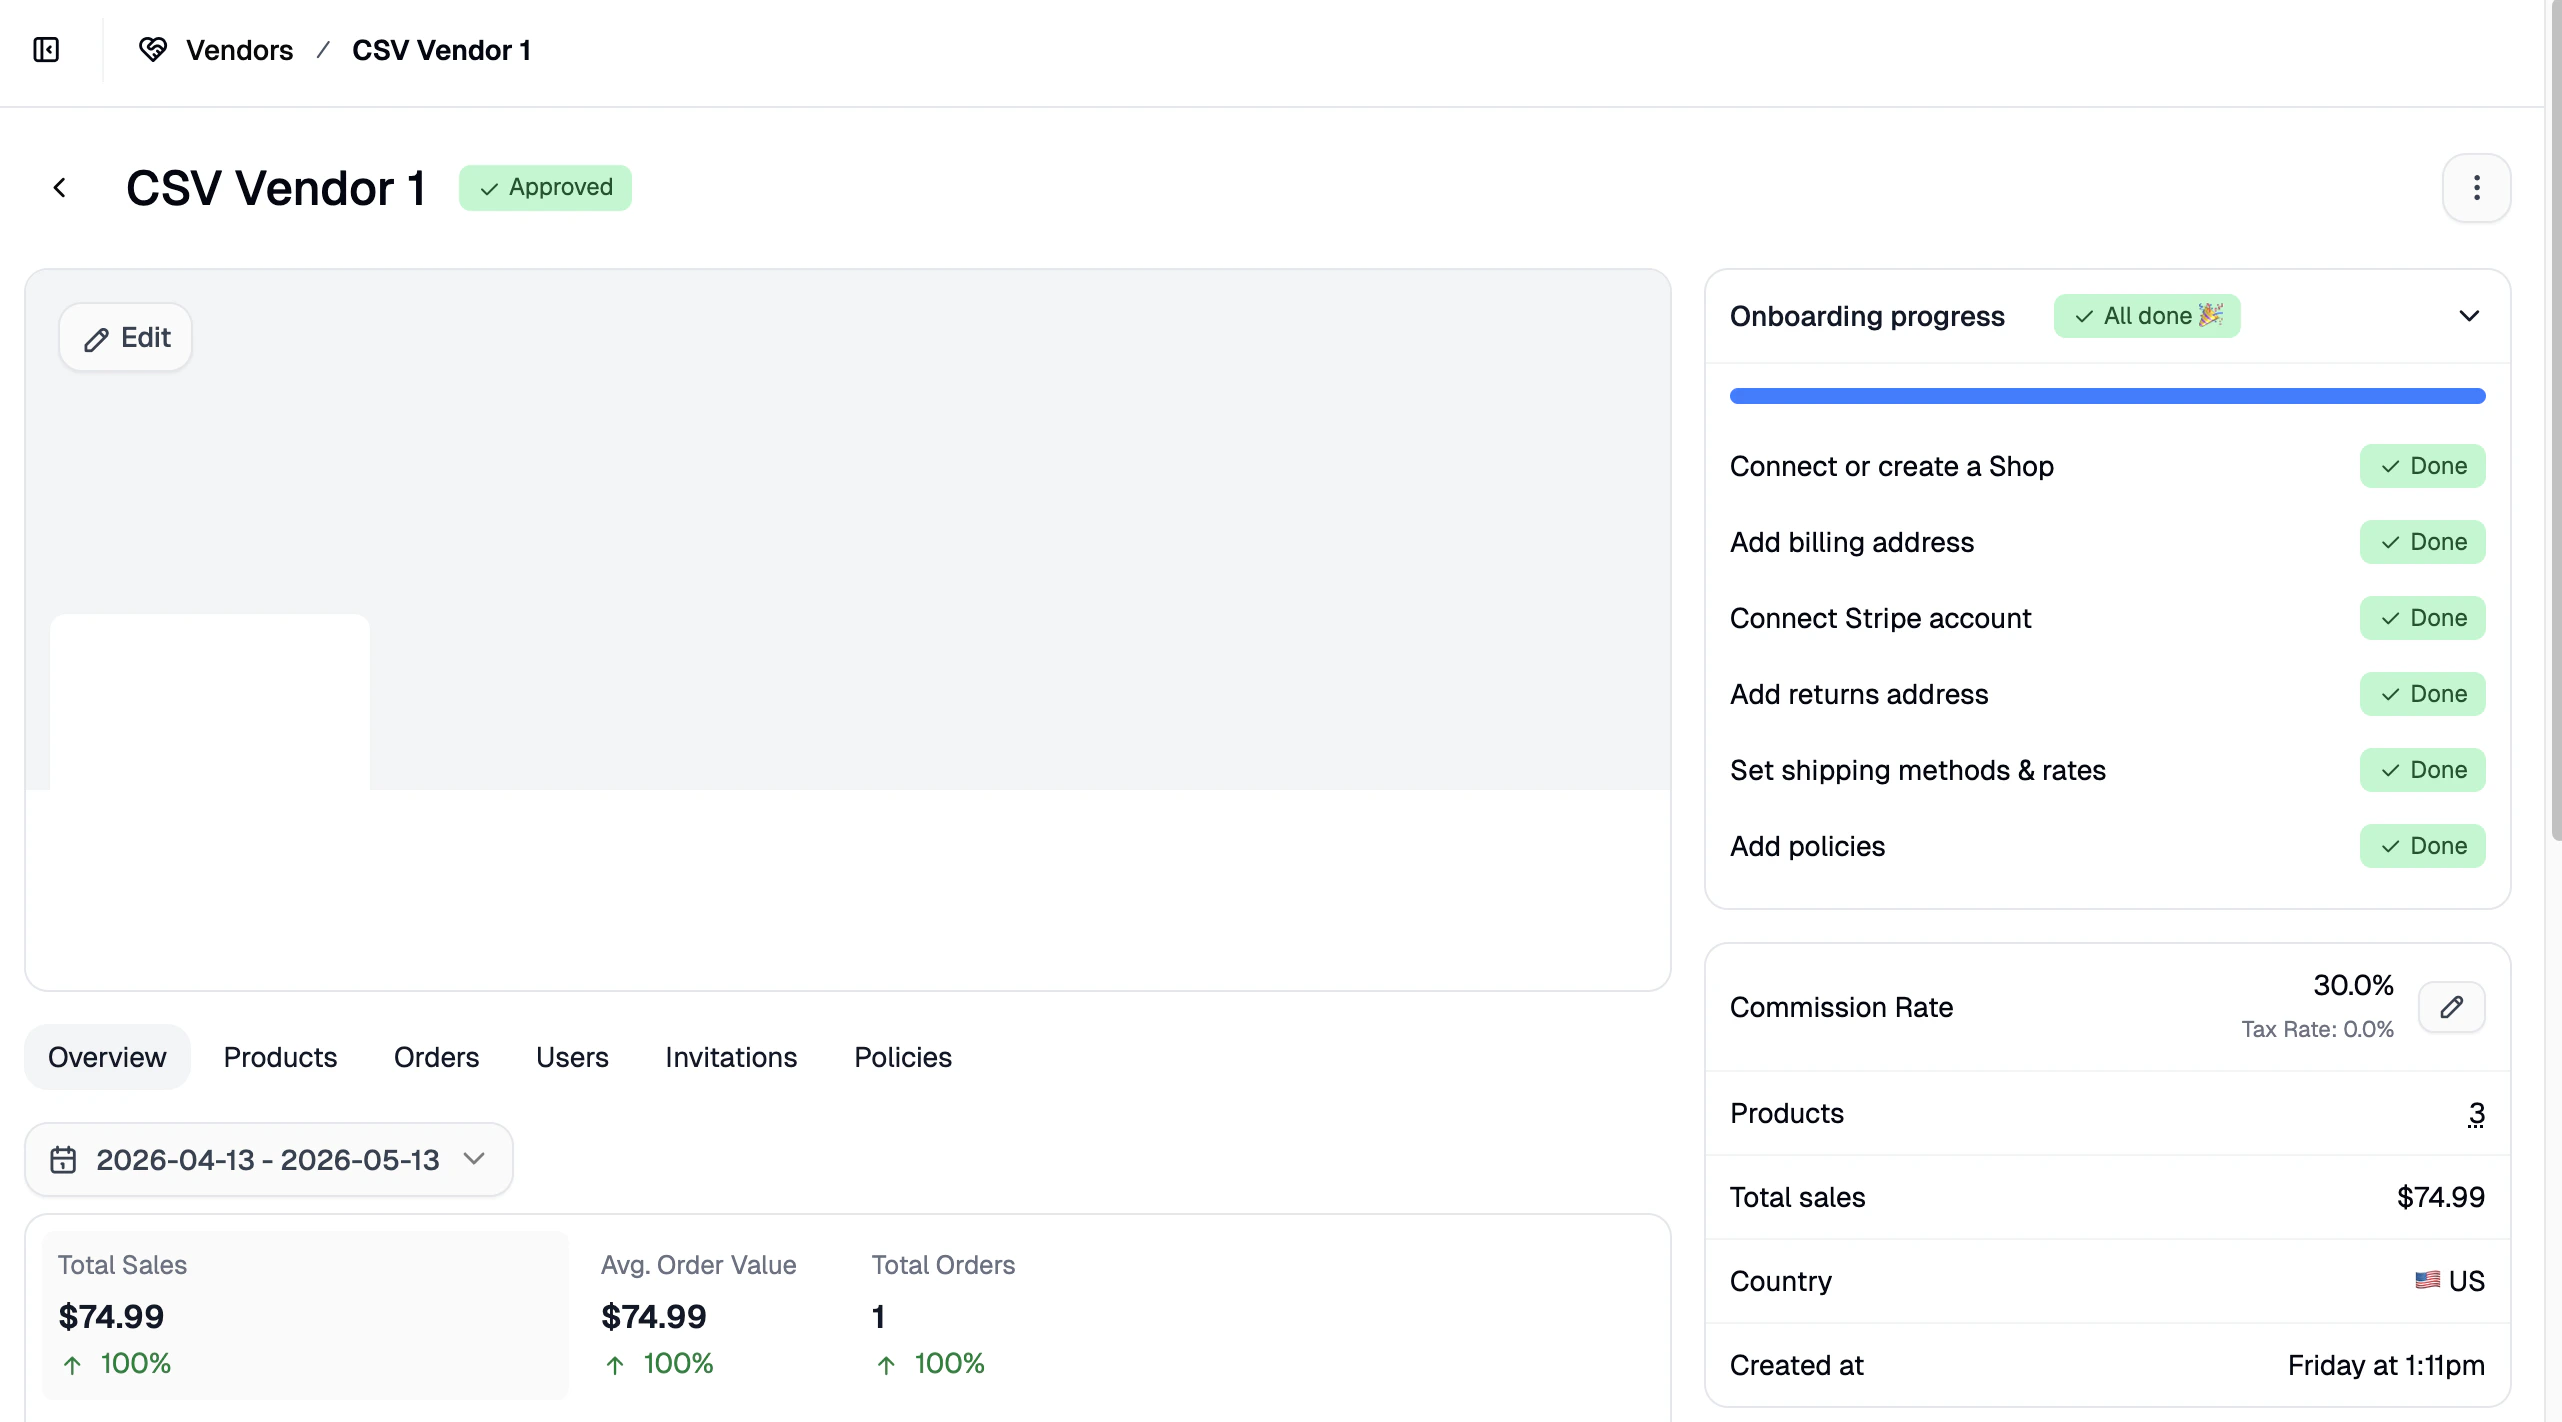 From the vendor profile you can view and configure the sections below.
Branding
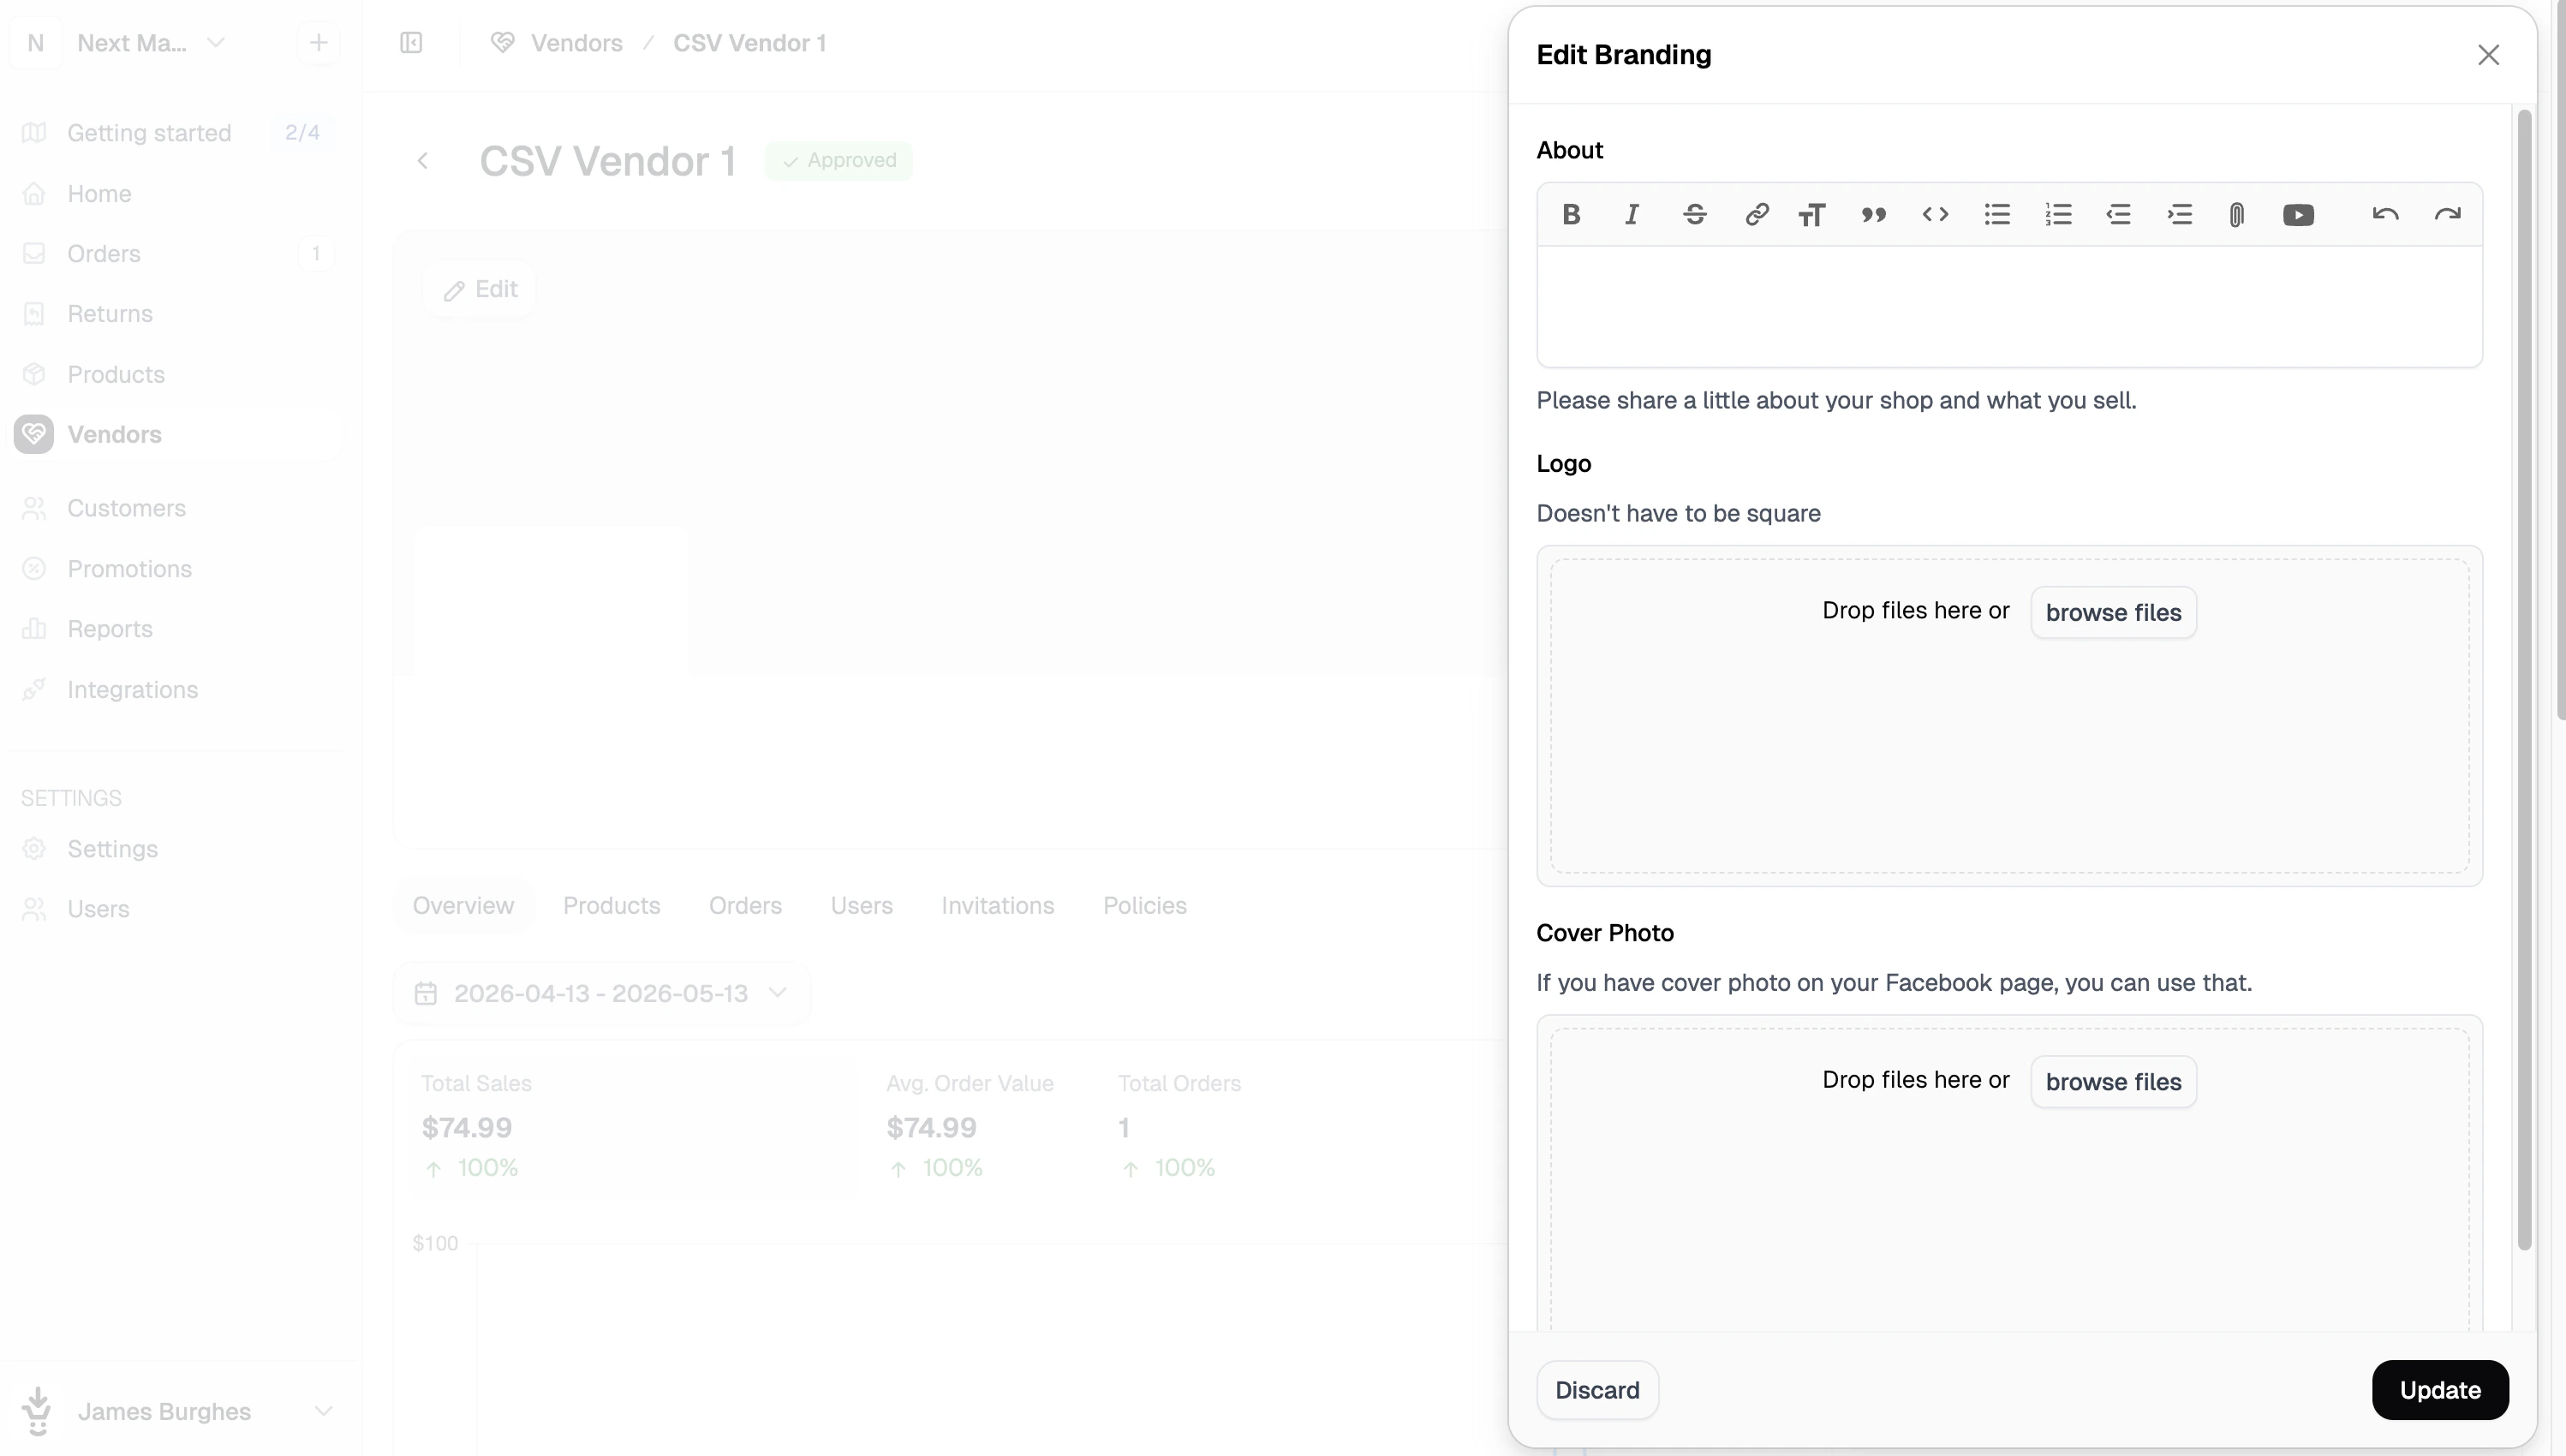 Click Edit at the top of the profile to open the branding panel. You can configure:
- About - a short description of the vendor.
- Logo - the vendor’s primary logo (rectangular formats supported).
- Square Logo - recommended for avatars and compact display areas.
- Cover Photo - a wider banner image, similar to a Facebook cover photo.
These assets may be displayed on the vendor’s storefront pages and within their vendor dashboard.
Onboarding Progress
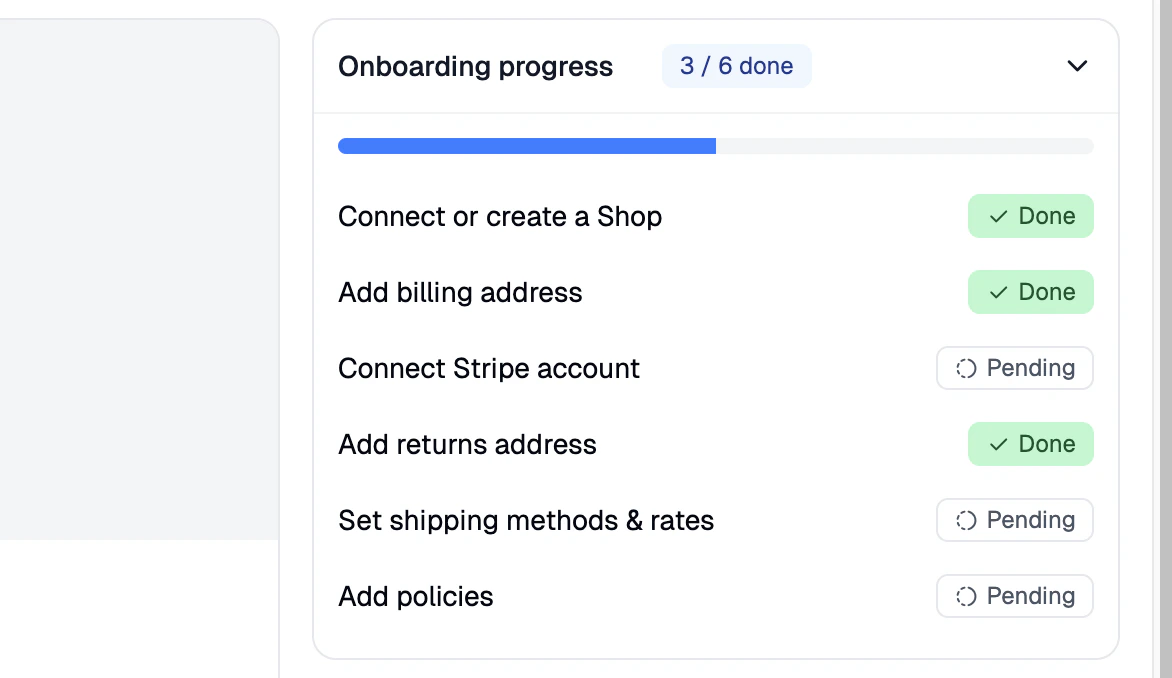 A detailed breakdown of which onboarding tasks the vendor has and hasn’t completed.
This helps you:
A detailed breakdown of which onboarding tasks the vendor has and hasn’t completed.
This helps you:
- Identify blockers that are holding a vendor up.
- Follow up with vendors who are stuck mid-flow.
- Approve vendors once they’ve met all the requirements.
For a walkthrough of what vendors see during onboarding, see Shopify, WooCommerce, or Manual/CSV Vendor Onboarding.
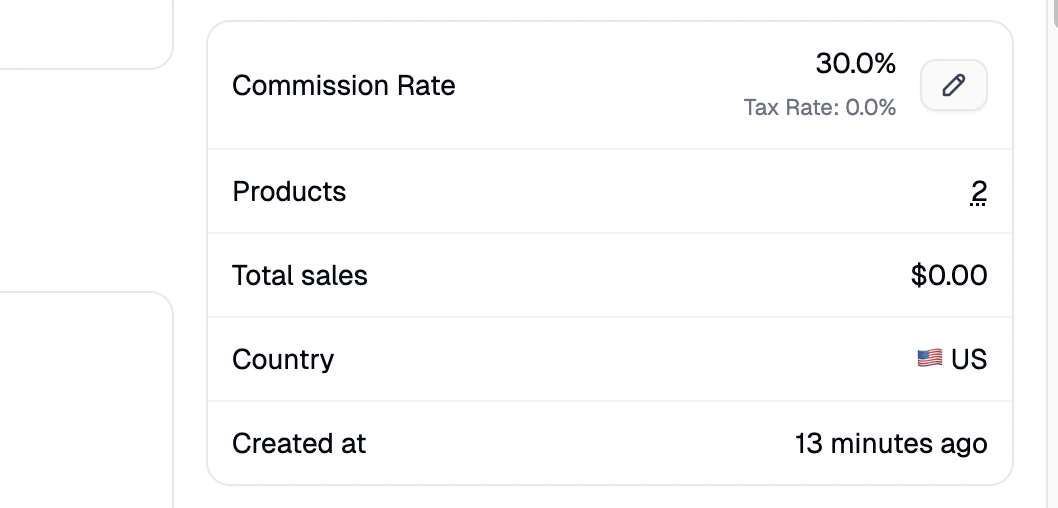 A quick snapshot of vendor performance and financial terms:
- Commission Rate - the rate currently applied to this vendor. Click the pencil icon to update.
- Number of Products - total products in the vendor’s catalog.
- Total Sales - lifetime sales generated by the vendor.
- Country / Location - the vendor’s registered country.
For more on how commission rates work across the marketplace, see Commission Rates.
Payments & Payouts
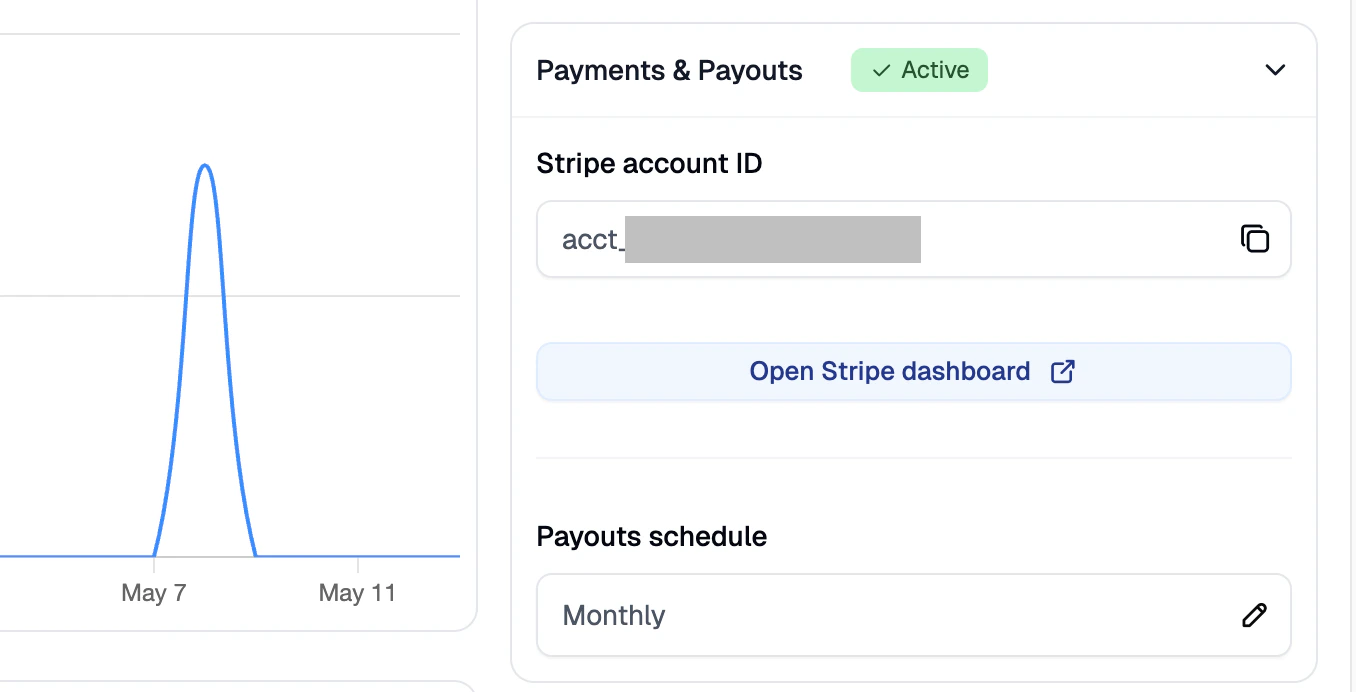 If the vendor is using Stripe Connect, you can manage their payout setup here:
- Stripe Account ID - copy the vendor’s Stripe Account ID for reference or support purposes.
- Payout Schedule - how often the vendor receives payouts. Options:
- Daily
- Weekly
- Bi-weekly
- Monthly
- Use Marketplace Default Interval
Stripe Connect is only available in Spree Enterprise Edition. If your marketplace uses a different payment provider, payout schedule controls won’t be available here.
Returns & Billing Address
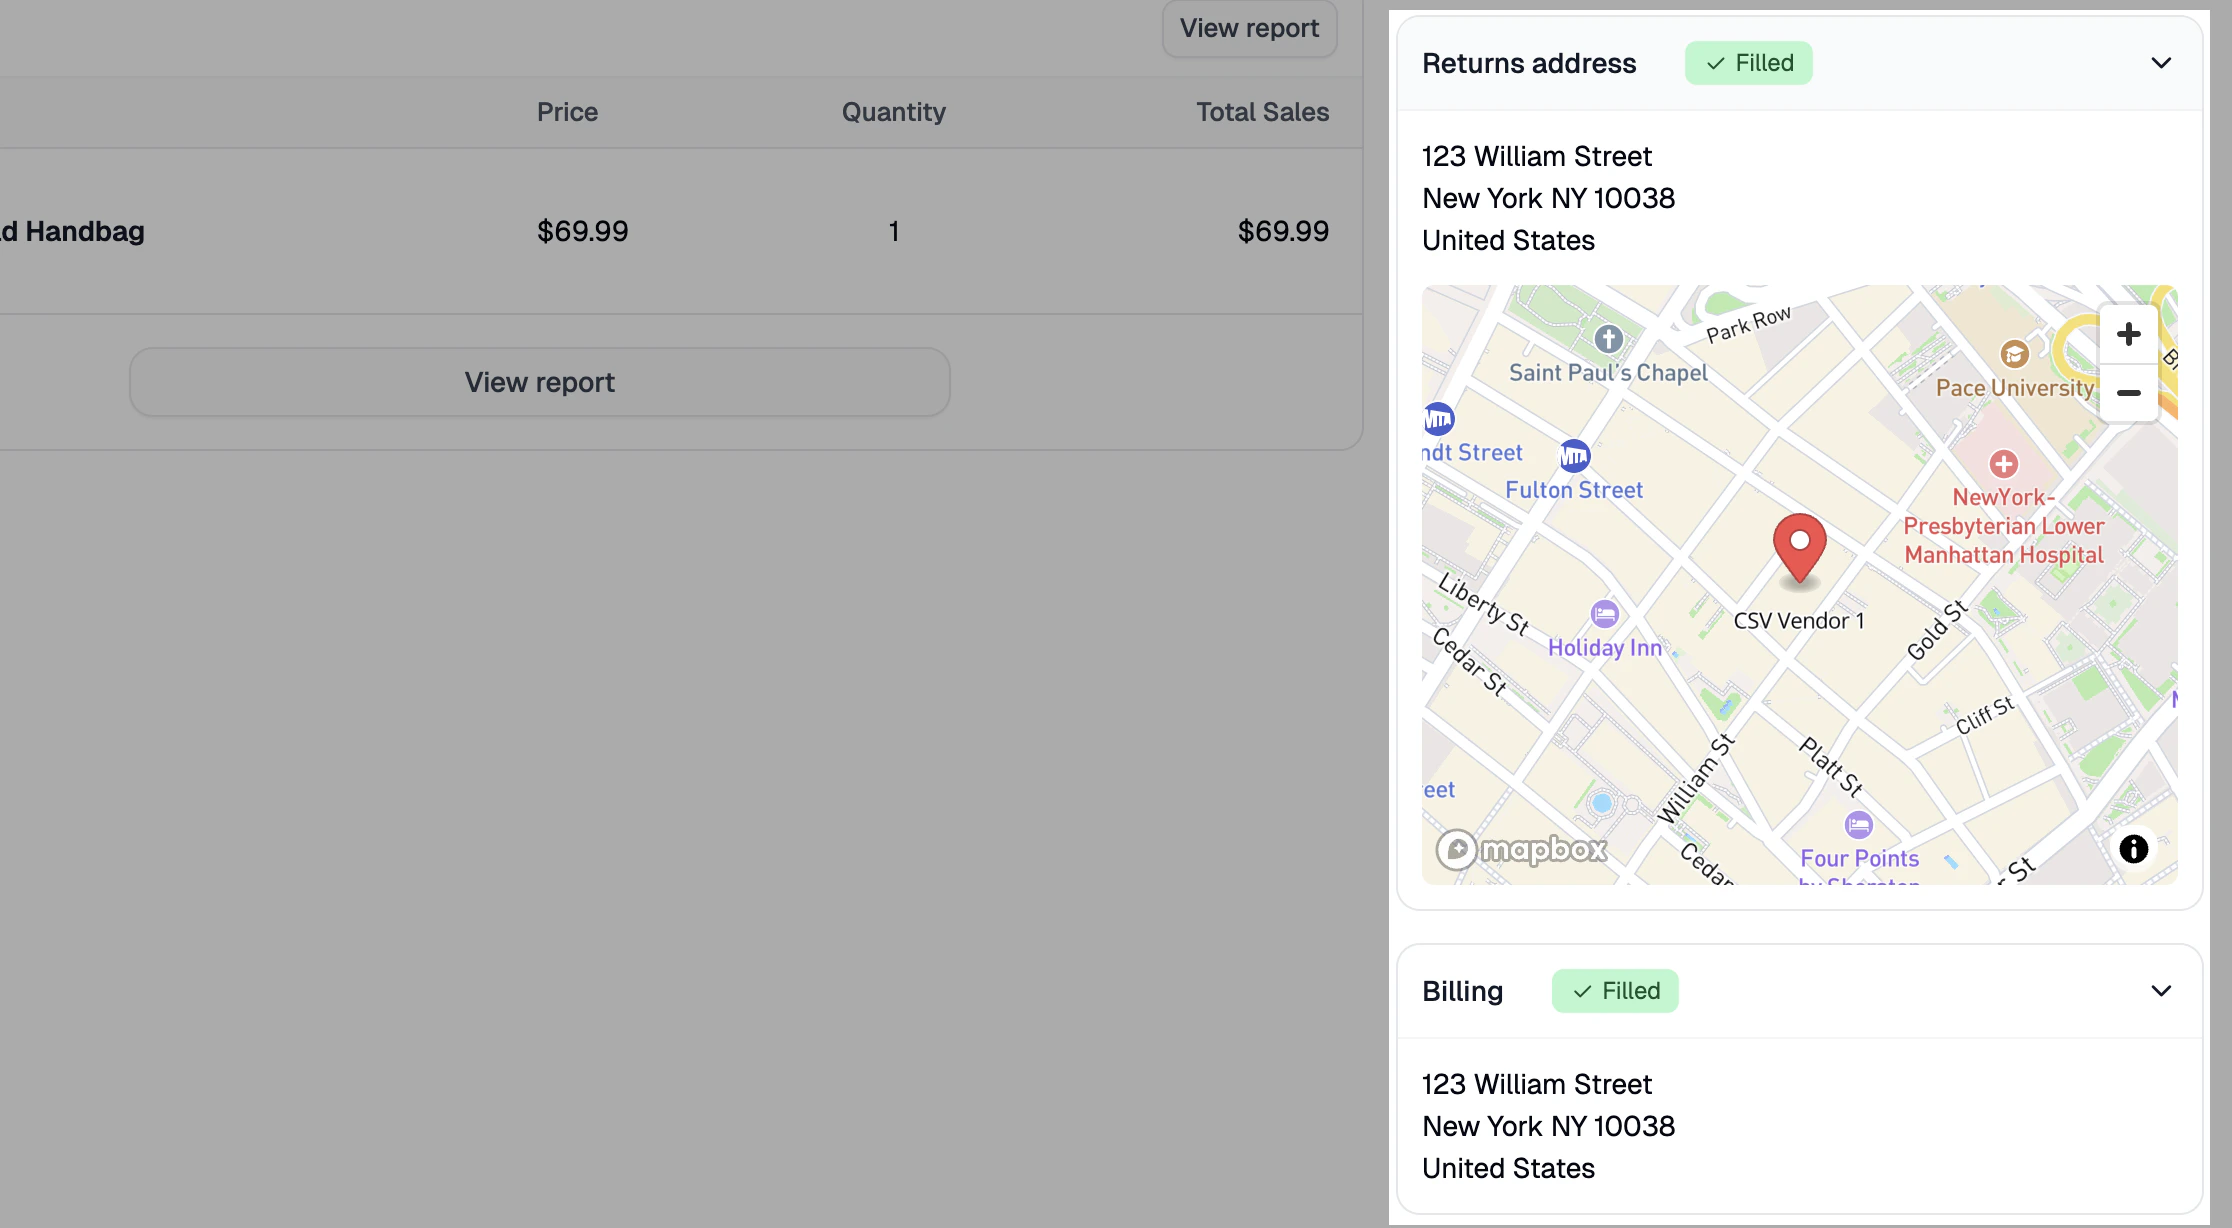 These sections display the vendor’s registered returns and billing addresses. Both are view-only — vendors update their own addresses from their vendor dashboard.
Vendor Subtabs
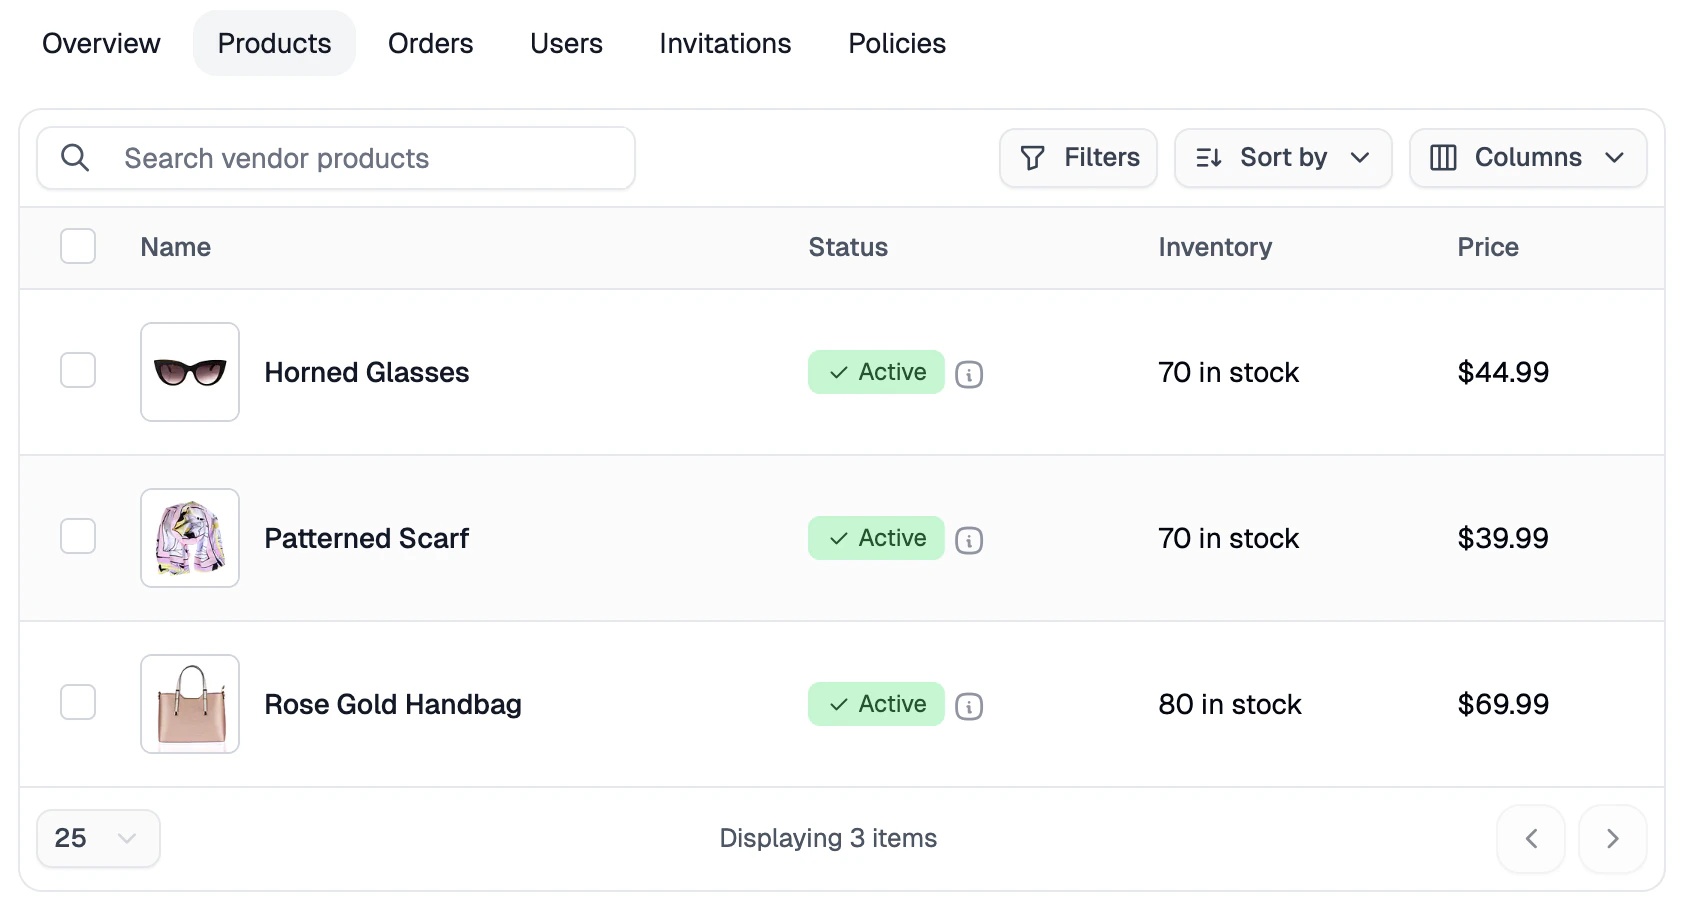
Similar to customer profiles, the vendor profile includes several subtabs for deeper management of the vendor’s activity.
Overview
A sales-over-time graph and a list of the vendor’s top-performing products — useful for a quick performance read at any point.
Products
Every product associated with the vendor. From here you can apply filters, sort results, perform bulk actions, and review product-level performance.
Orders
Every order placed with the vendor. You can filter orders, review payment and shipment states, and monitor fulfillment activity.
Users
All vendor users associated with the account — that is, users who have accepted invitations and now have access to the vendor dashboard. Useful for tracking who on the vendor’s team has access.
Invitations
All invitations sent to vendor users. From this tab you can see invitation status, copy pending invite links, and monitor which users haven’t yet joined.
Policies
The vendor’s policies, including:
- Returns Policy (default)
- Any other policies you require from the vendor
Admins can edit these policies directly from this section.
