- Target different customer segments or regions
- Operate multiple brands or product lines
- Offer localized shopping experiences
Add a New Store
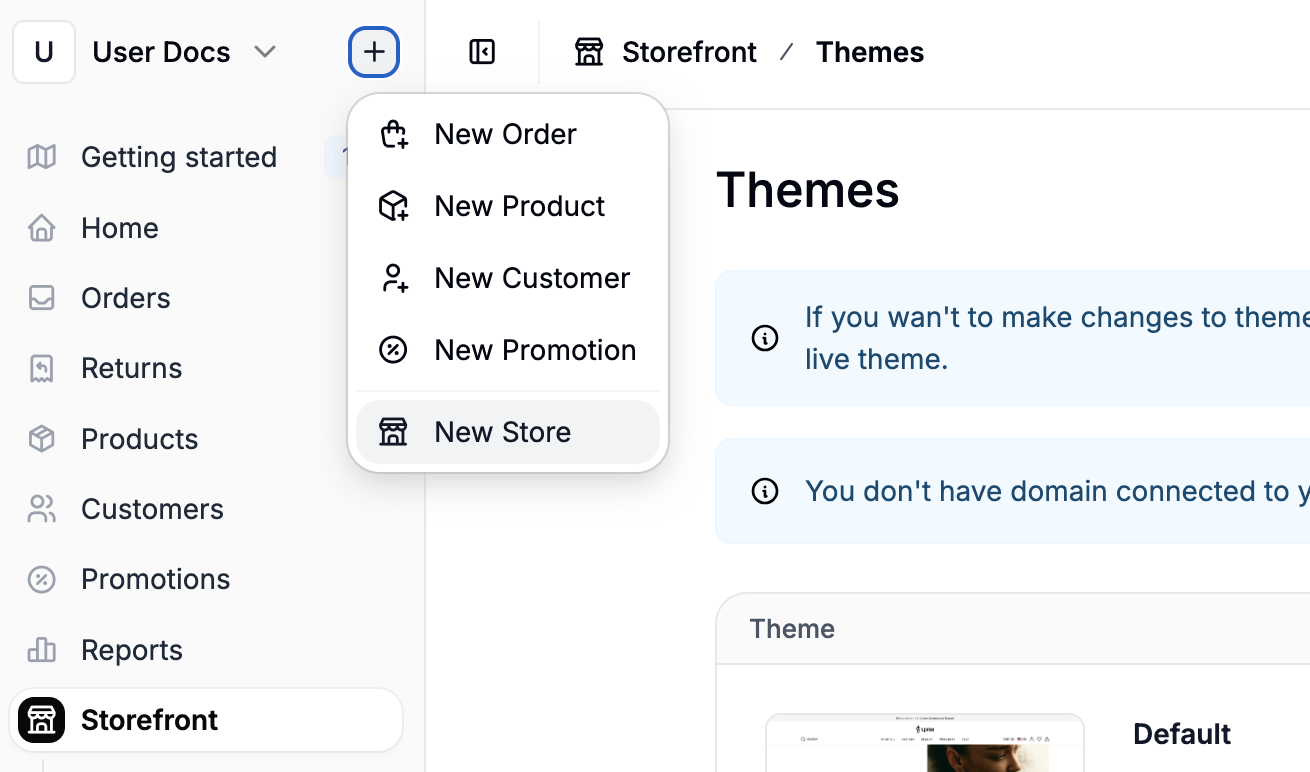
- Click + next to your store name in the top-left corner of the admin dashboard.
- Select New Store from the dropdown.
Required Settings
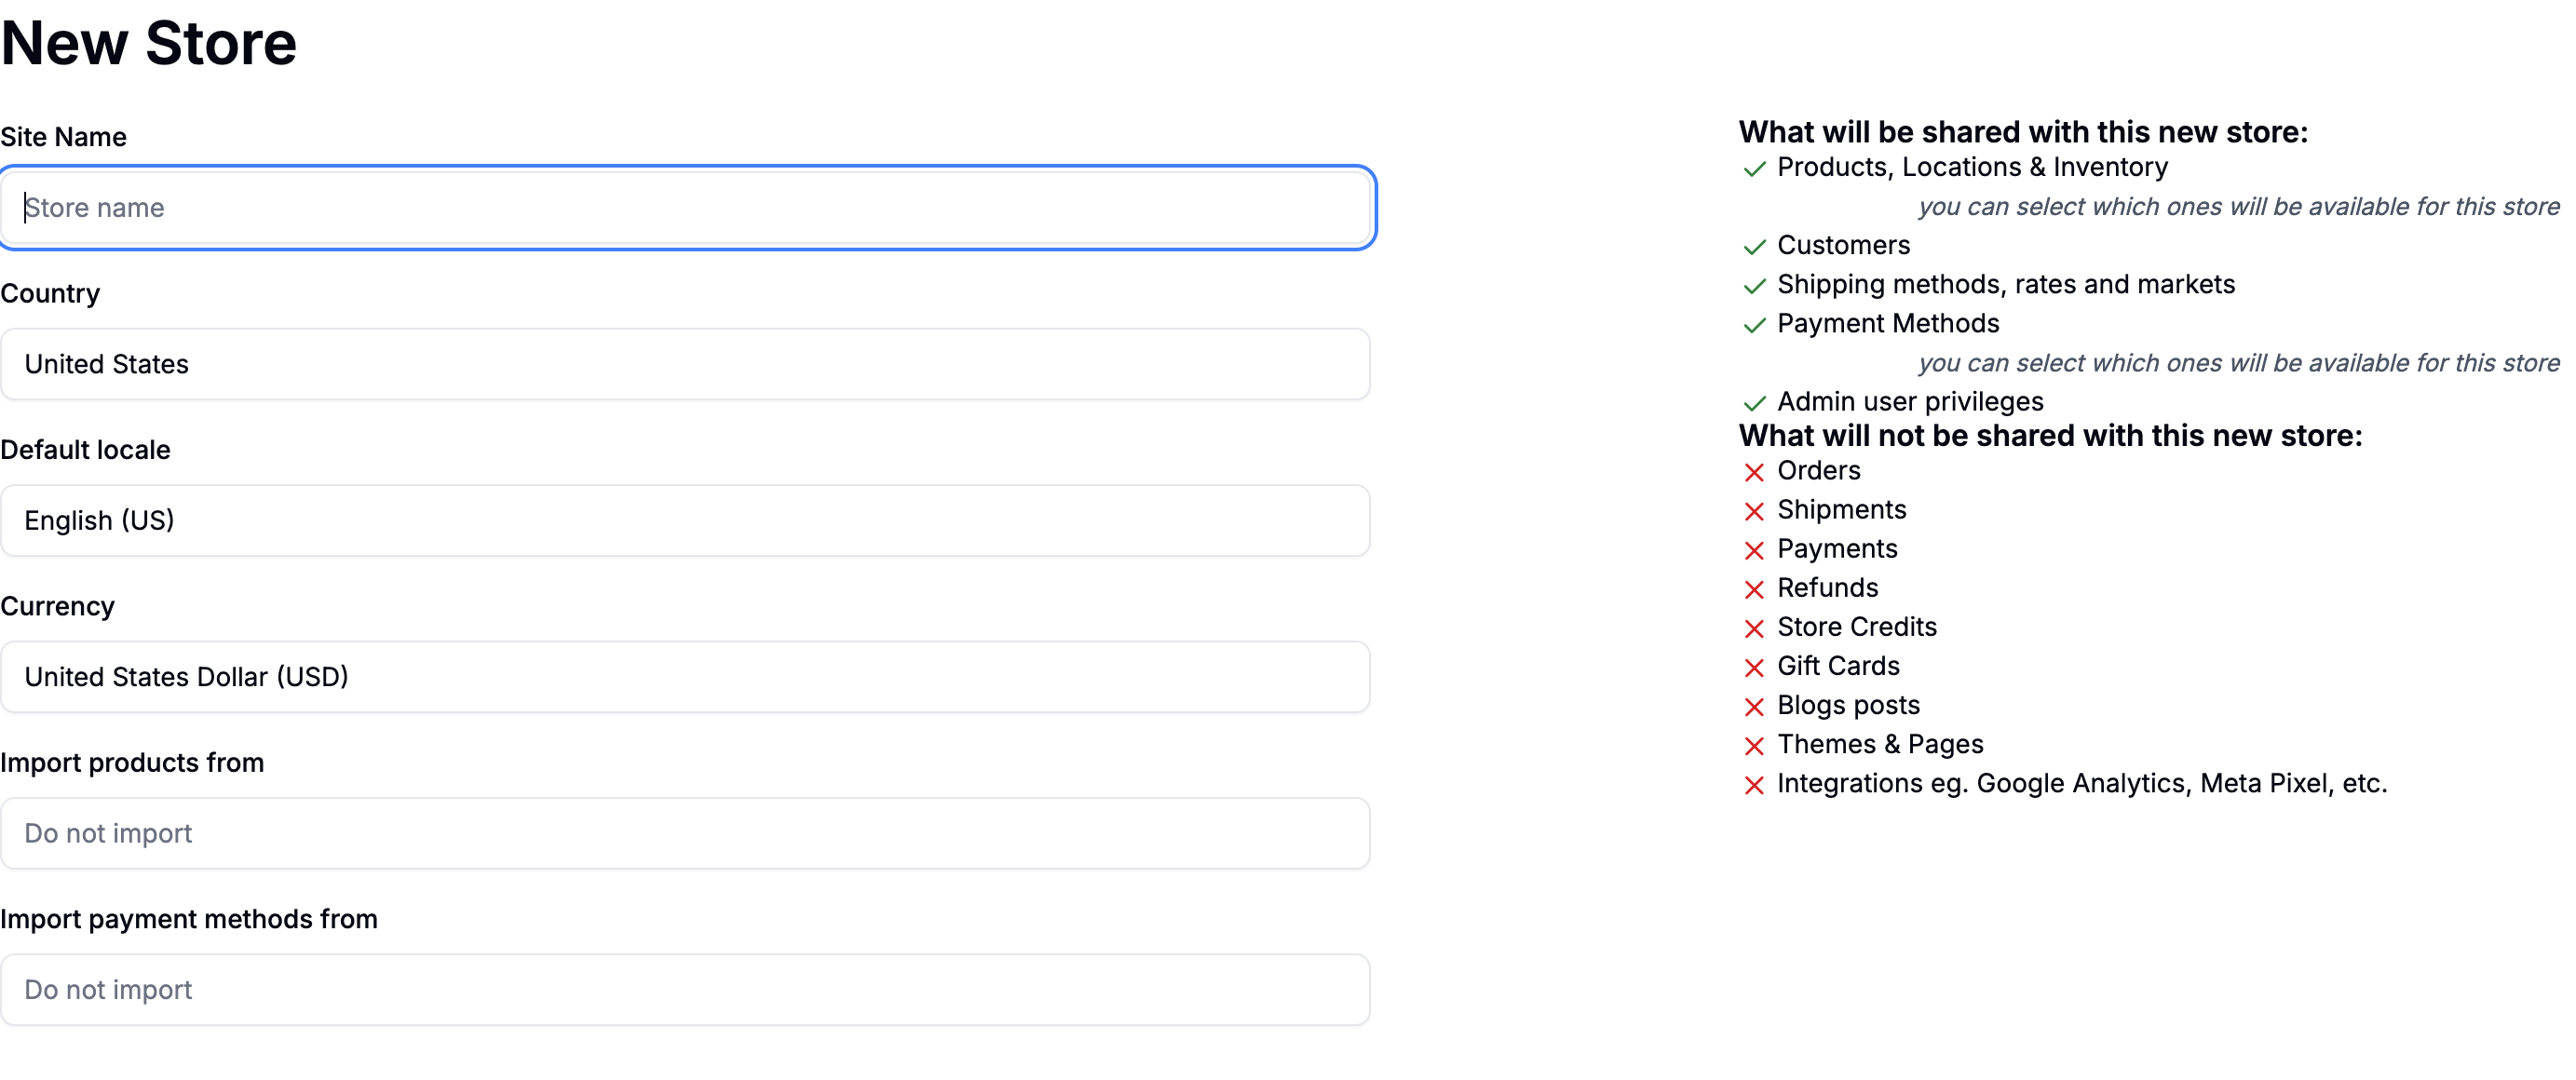
- Site Name - the public-facing name of your store (used in social sharing and SEO)
- Country - the country this store will serve
- Default locale - the default language to be used on the store
- Currency - the currency used at checkout
- Import Products - whether to import existing products from another store
- Import Payment Methods - whether to import payment methods from another store
Your choices should align with your business strategy. For example, if you’re launching in a new region, you might use a different currency or pricing strategy but reuse your product catalog and payment setup.
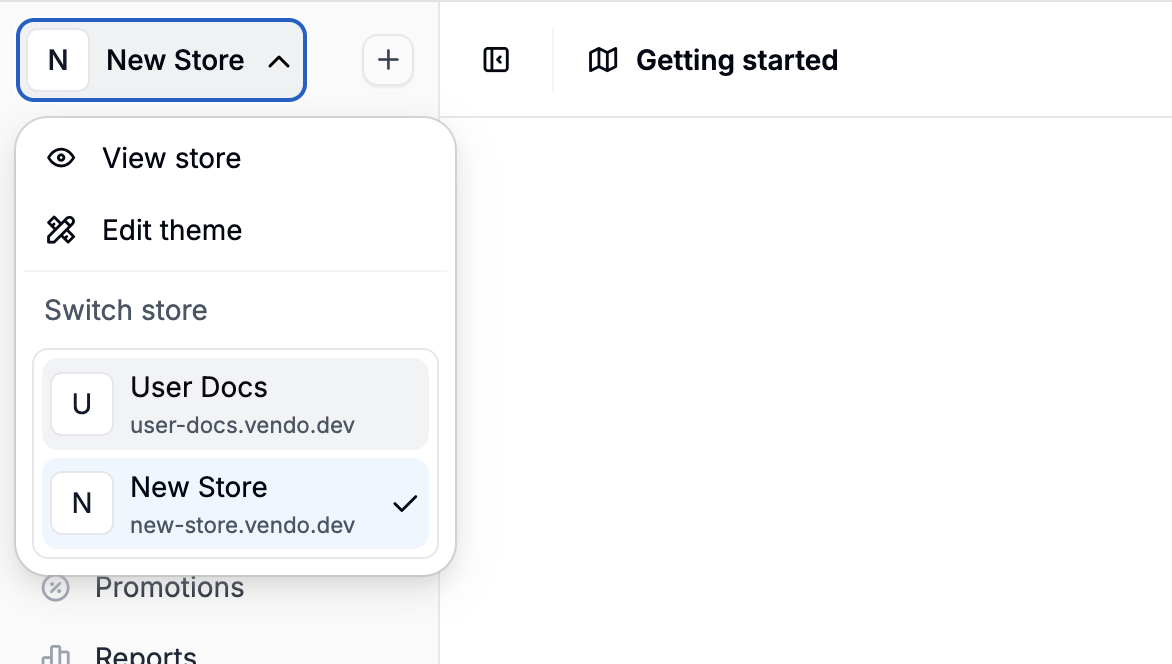
Switch Between Stores
Cross-Store Data Sharing
When creating a new store, Spree gives you control over what data is shared and what remains separate.Shared with New Store
- Products, Inventory & Locations (can choose which apply to this store)
- Customers
- Shipping Methods, Rates, Markets
- Payment Methods (selectable per store)
- Admin User Access
Not Shared with New Store
- Orders
- Shipments
- Payments
- Refunds
- Store Credits
- Gift Cards
- Blog Posts
- Themes & Pages
- Integrations (e.g., Google Analytics, Meta Pixel)
Next Steps
Once your new store is created, you can:- Customize the storefront theme
- Set up store-specific promotions
- Manage localized shipping and tax settings
- Import or manage your product catalog