

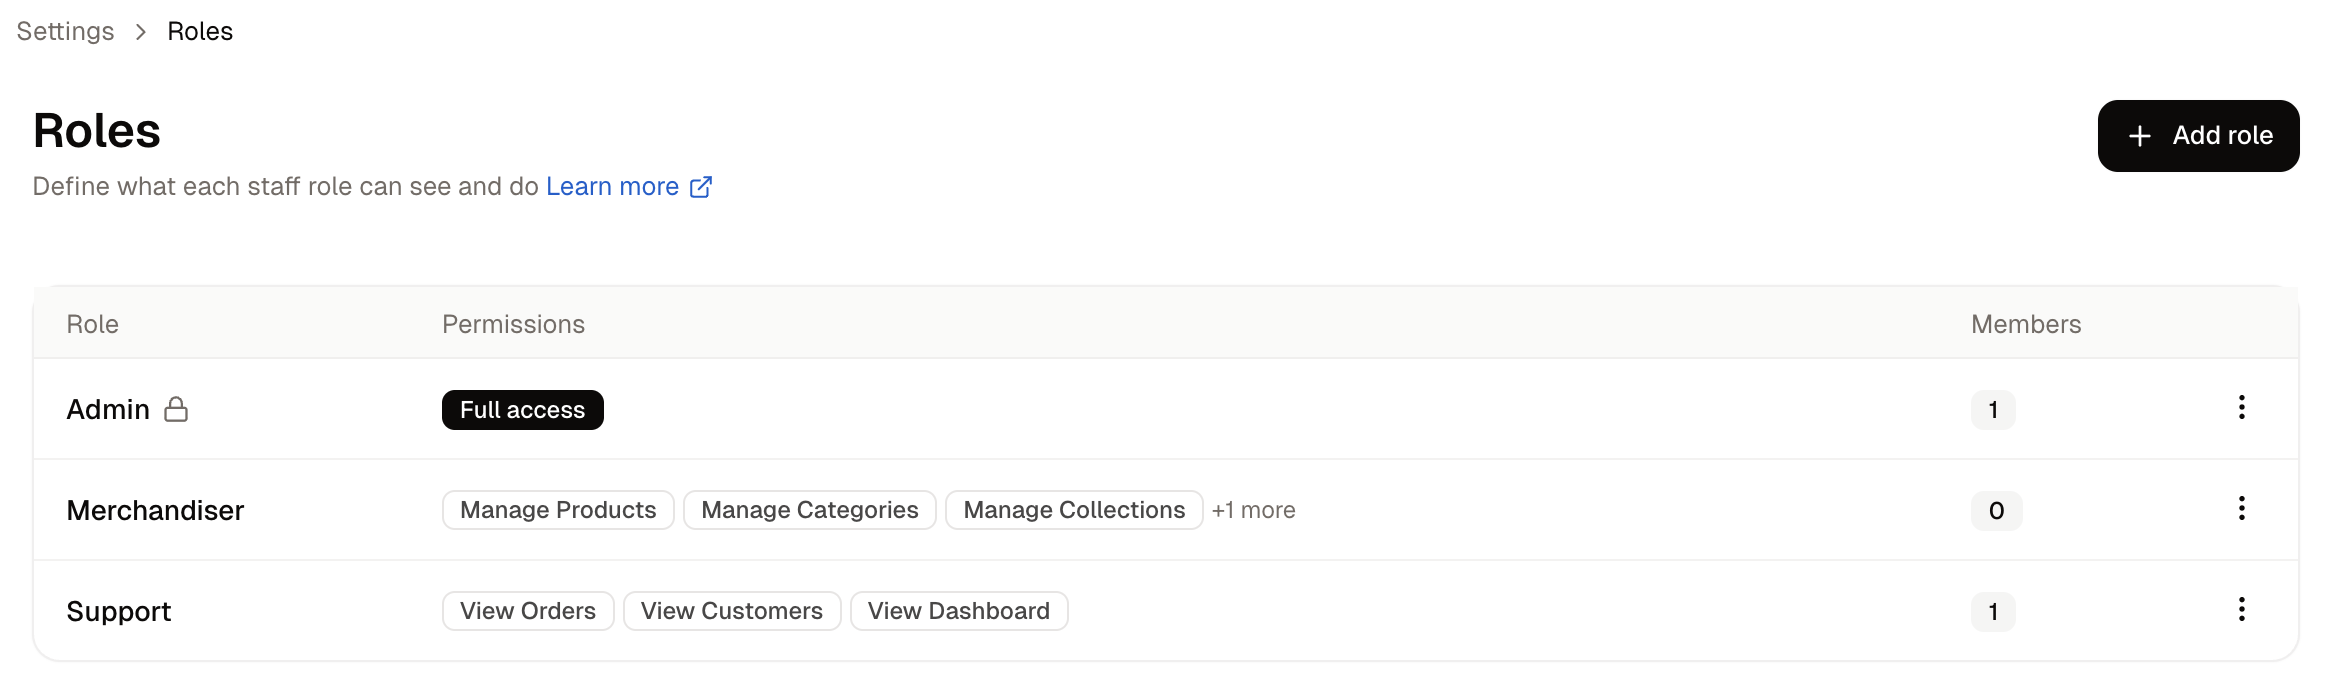
- Role - What the role is called.
- Permissions - A badge reading Full access, No permissions, or a count of what is granted.
- Members - How many staff hold it.
How to Create a Role
Click Add role.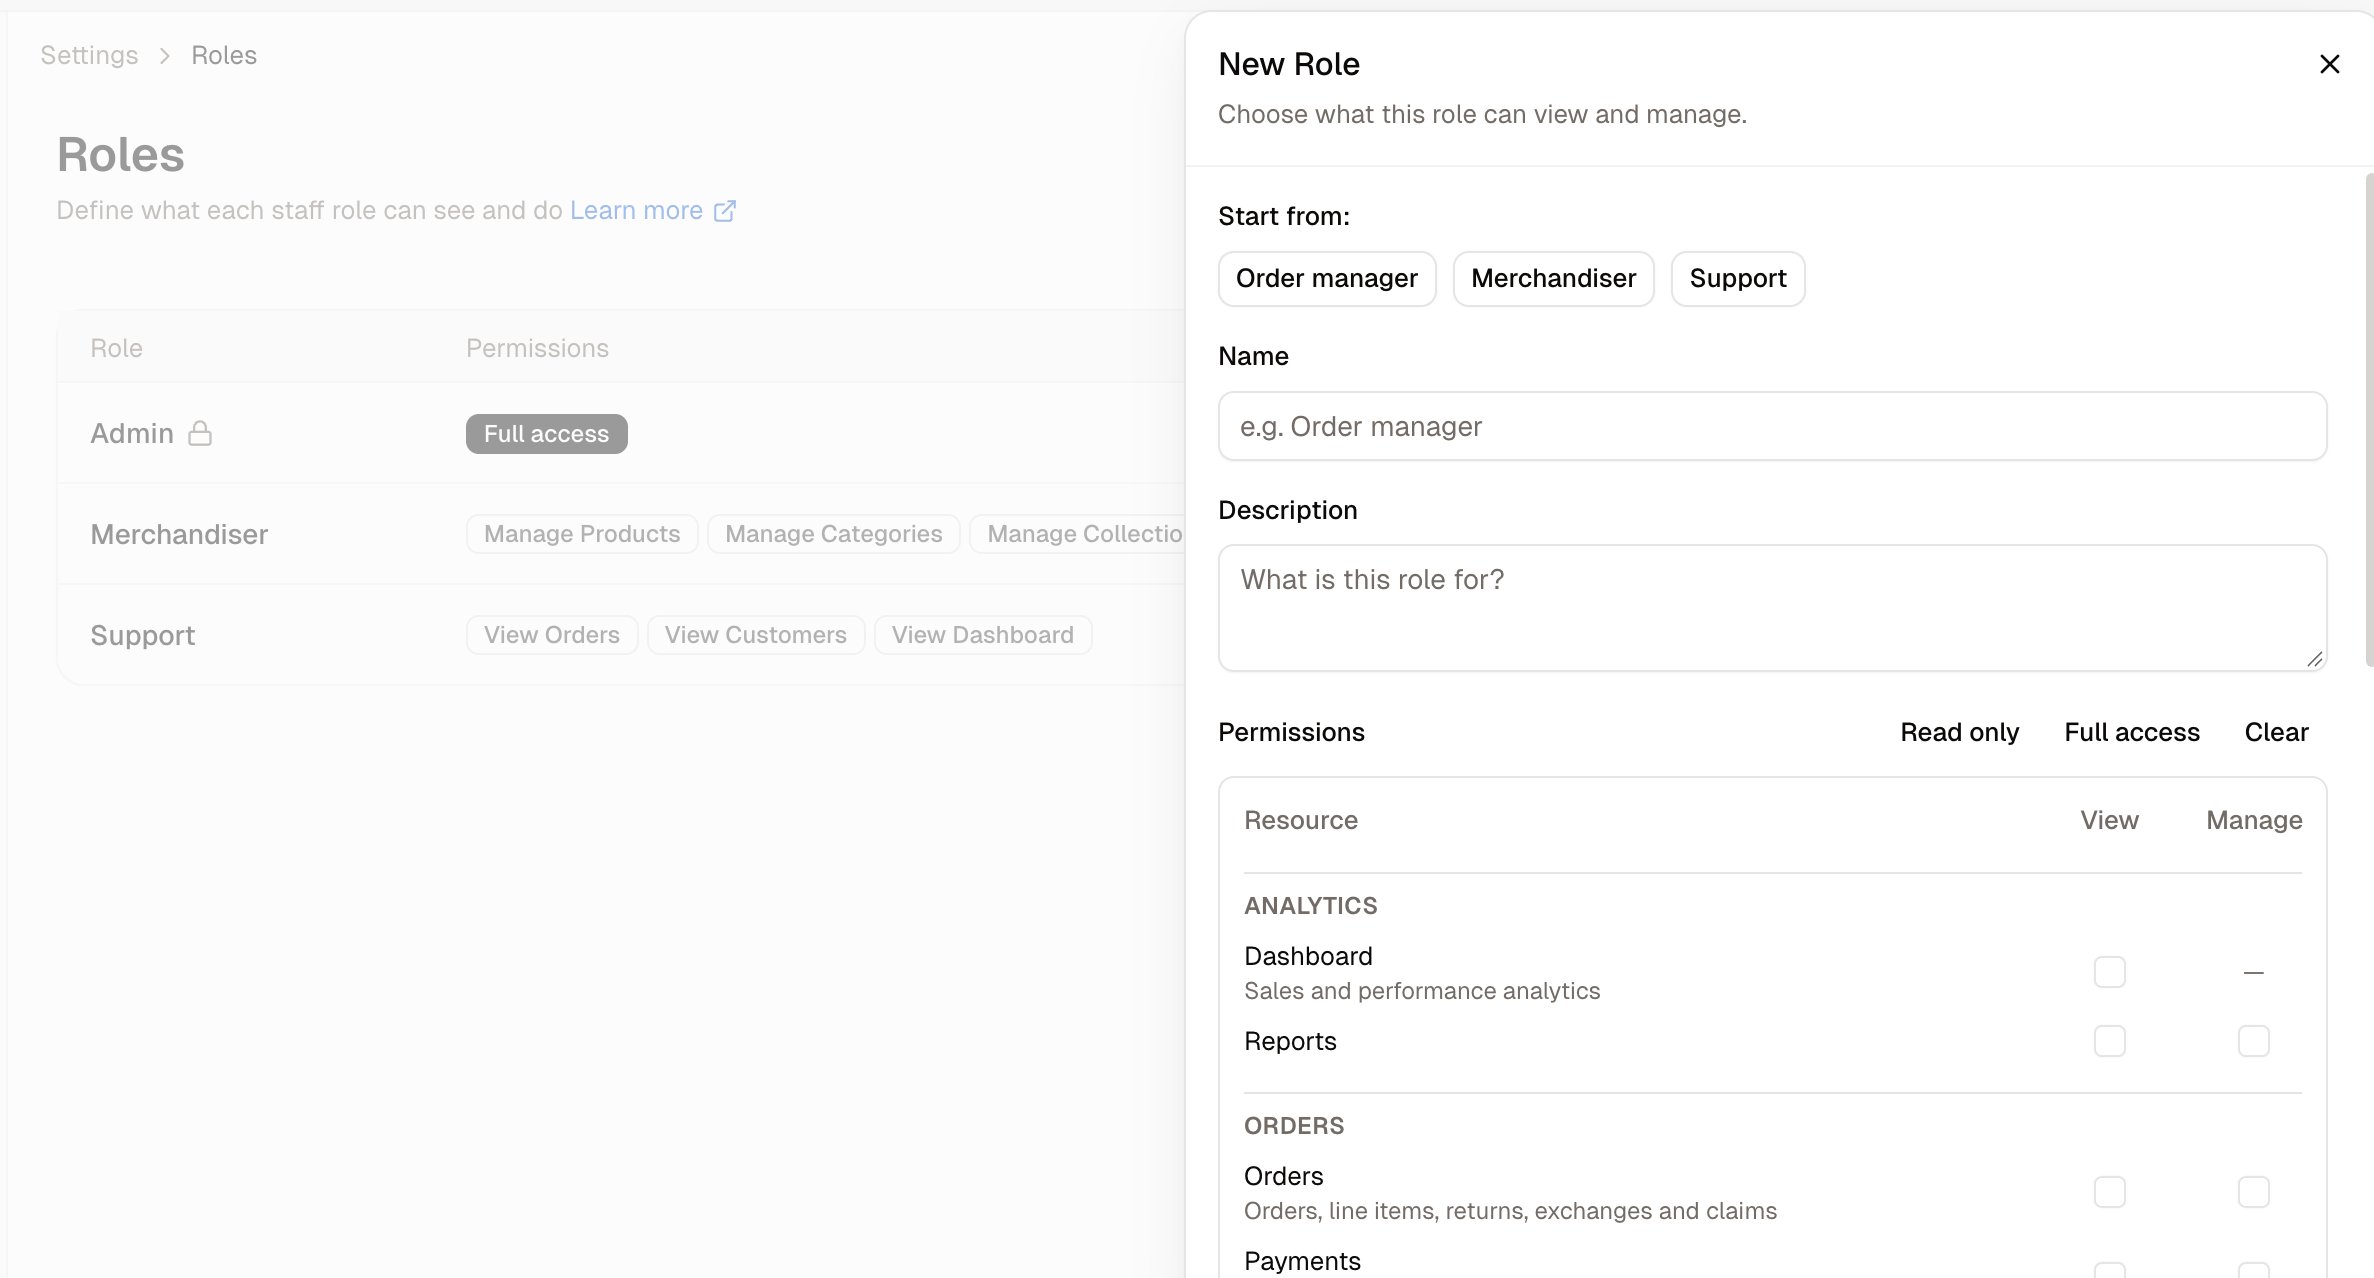
- Optionally click one of the three Start from templates, Order manager, Merchandiser or Support, to fill the grid with a sensible starting set rather than an empty one.
- Give the role a Name, and a Description if the name is not self-explanatory.
- Set the permissions in the grid below.
- Click Save.
Setting permissions
The grid has a row per resource and two tick boxes on each: View for being able to open it, Manage for being able to change it. Three buttons above the grid set every row at once: Read only, Full access and Clear. Starting from one of these and adjusting is usually faster than working down 28 rows.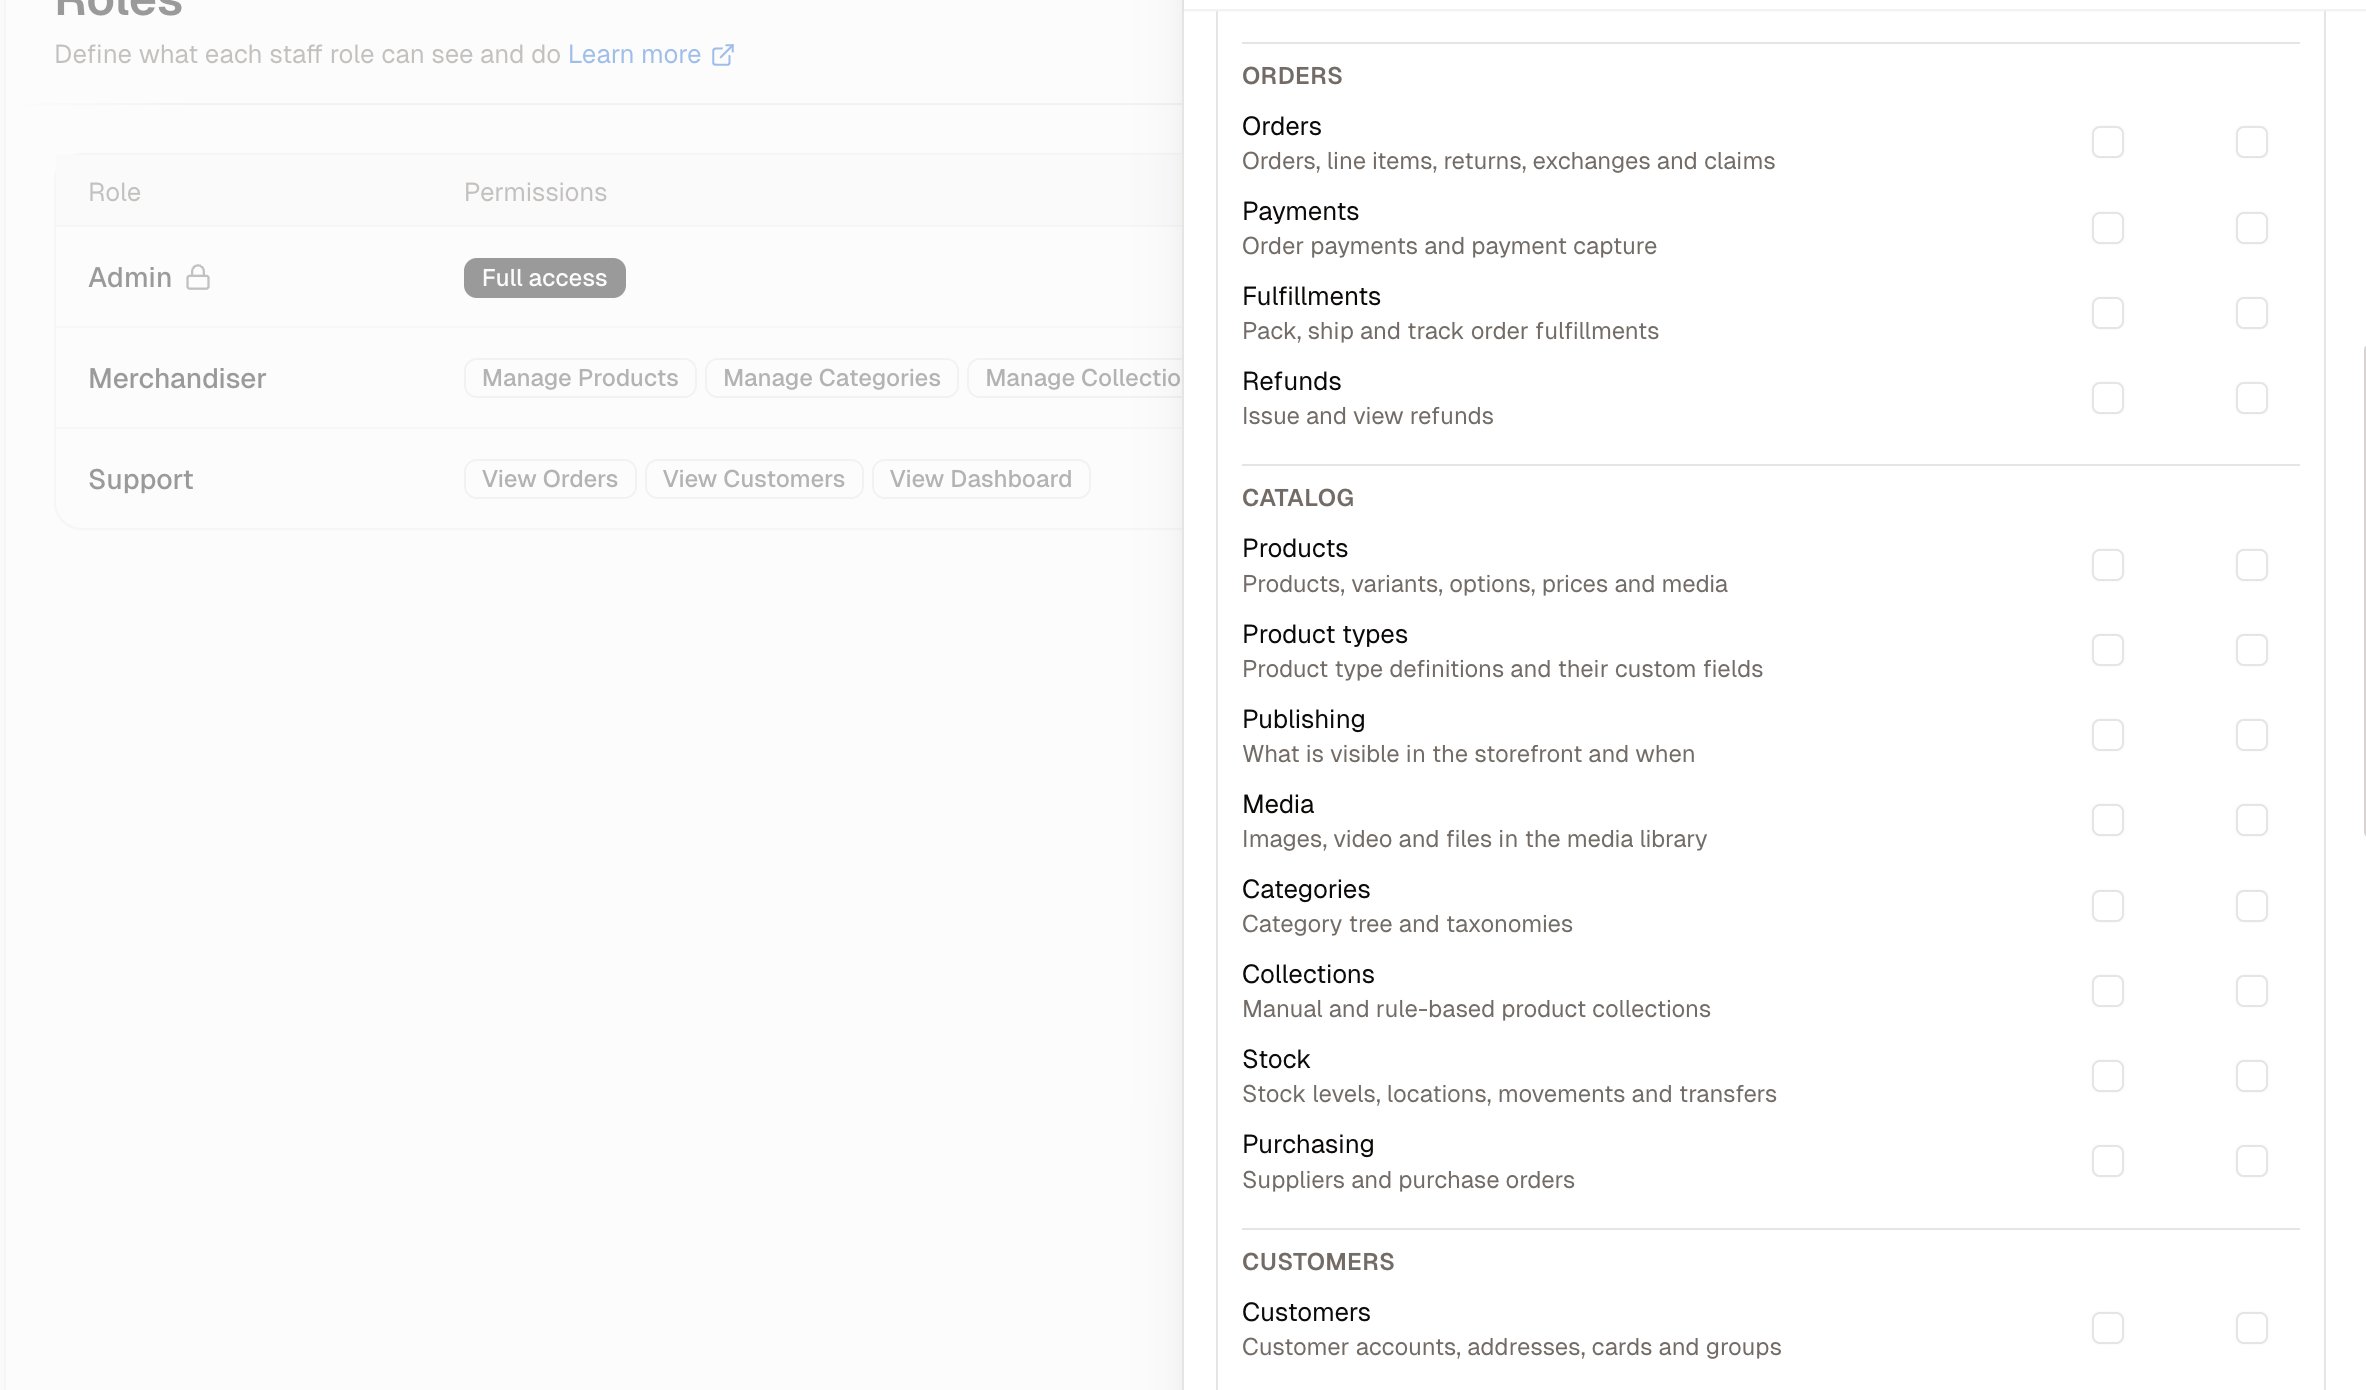
What you can grant
The grid holds 28 resources in 9 groups.Dashboard can be viewed but not managed, so it offers only one of the two tick boxes.
How to Edit a Role
Open the row actions and choose Edit, then adjust the grid and save. Changes take effect for everybody holding that role, so narrowing a role narrows it for every member at once.The built-in Admin role is protected and cannot be edited. To run a variation on it, create a new role and start from Full access.