> ## Documentation Index
> Fetch the complete documentation index at: https://spreecommerce.org/docs/llms.txt
> Use this file to discover all available pages before exploring further.
# Roles
> Learn how to define what each staff role can see and do in Spree Commerce, using the permission grid.
A role is a permission set you give to staff. It decides which parts of the dashboard somebody has access to, and which of those they can change.
Most stores need three or four. A warehouse team needs stock and fulfilment but not payouts or API keys. A support agent needs orders and customers but has no reason to edit product prices. Giving everybody full access might be quicker on day one, but it can be harder to audit later, when you cannot tell who changed what.
To manage roles, navigate to **Settings → Roles**, under the **Users & permissions** group.
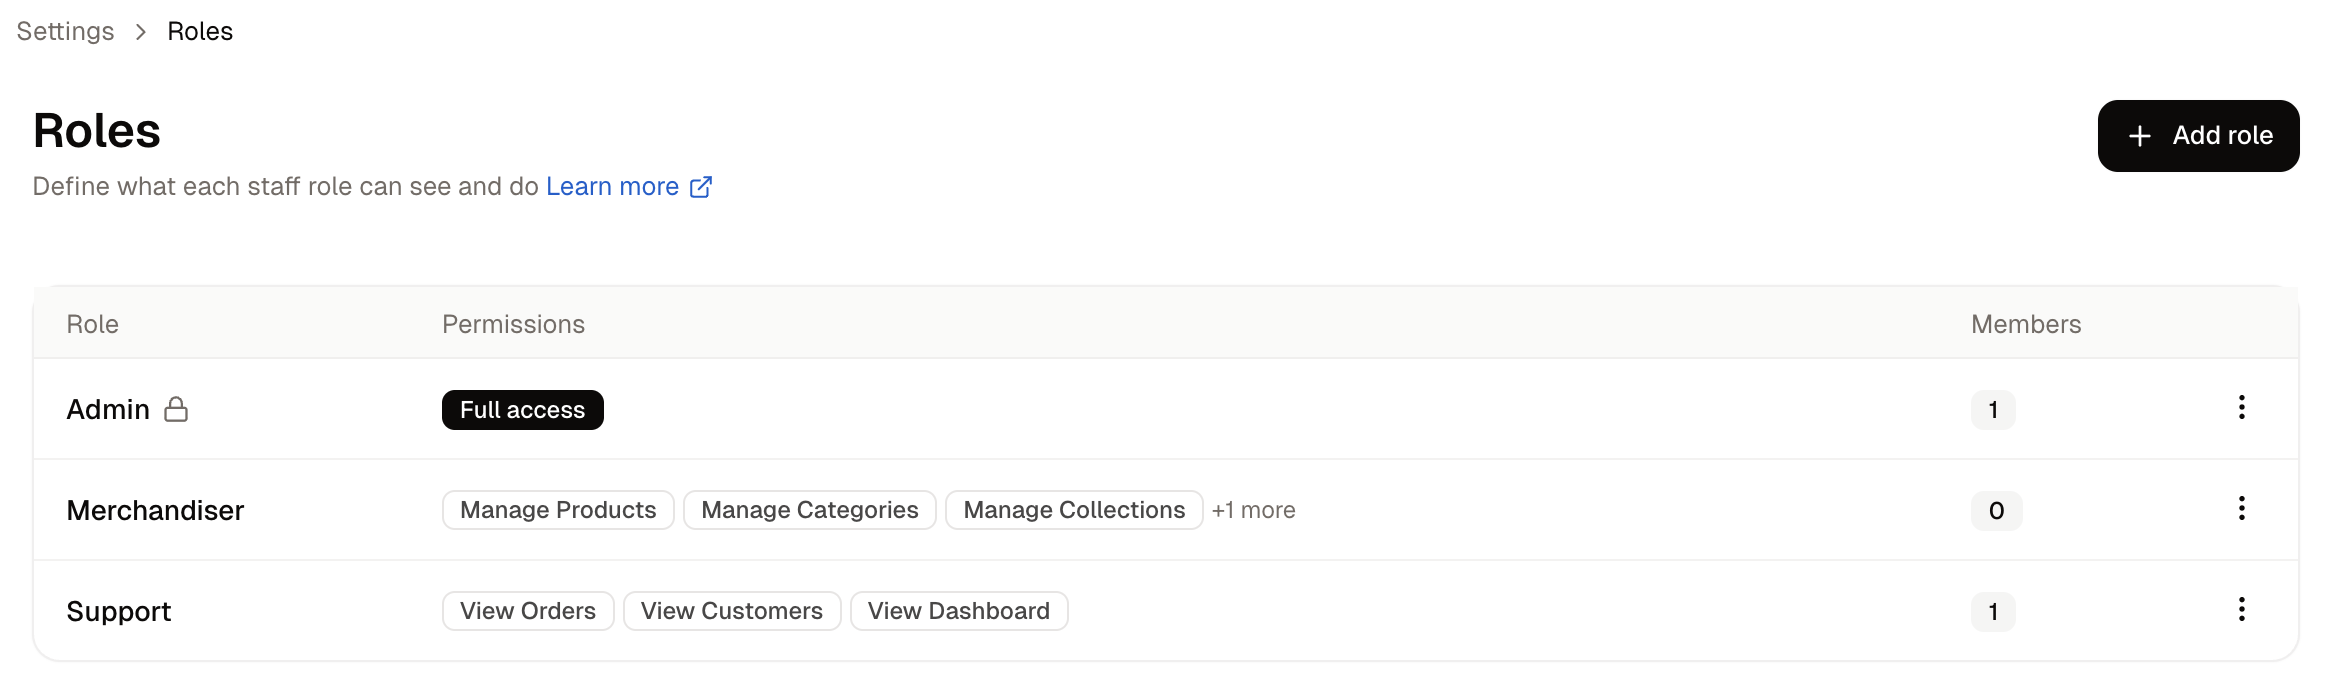 Each row shows:
* **Role** - What the role is called.
* **Permissions** - A badge reading **Full access**, **No permissions**, or a count of what is granted.
* **Members** - How many staff hold it.
A role Spree protects carries a **Protected** badge.
## How to Create a Role
Click **Add role**.
Each row shows:
* **Role** - What the role is called.
* **Permissions** - A badge reading **Full access**, **No permissions**, or a count of what is granted.
* **Members** - How many staff hold it.
A role Spree protects carries a **Protected** badge.
## How to Create a Role
Click **Add role**.
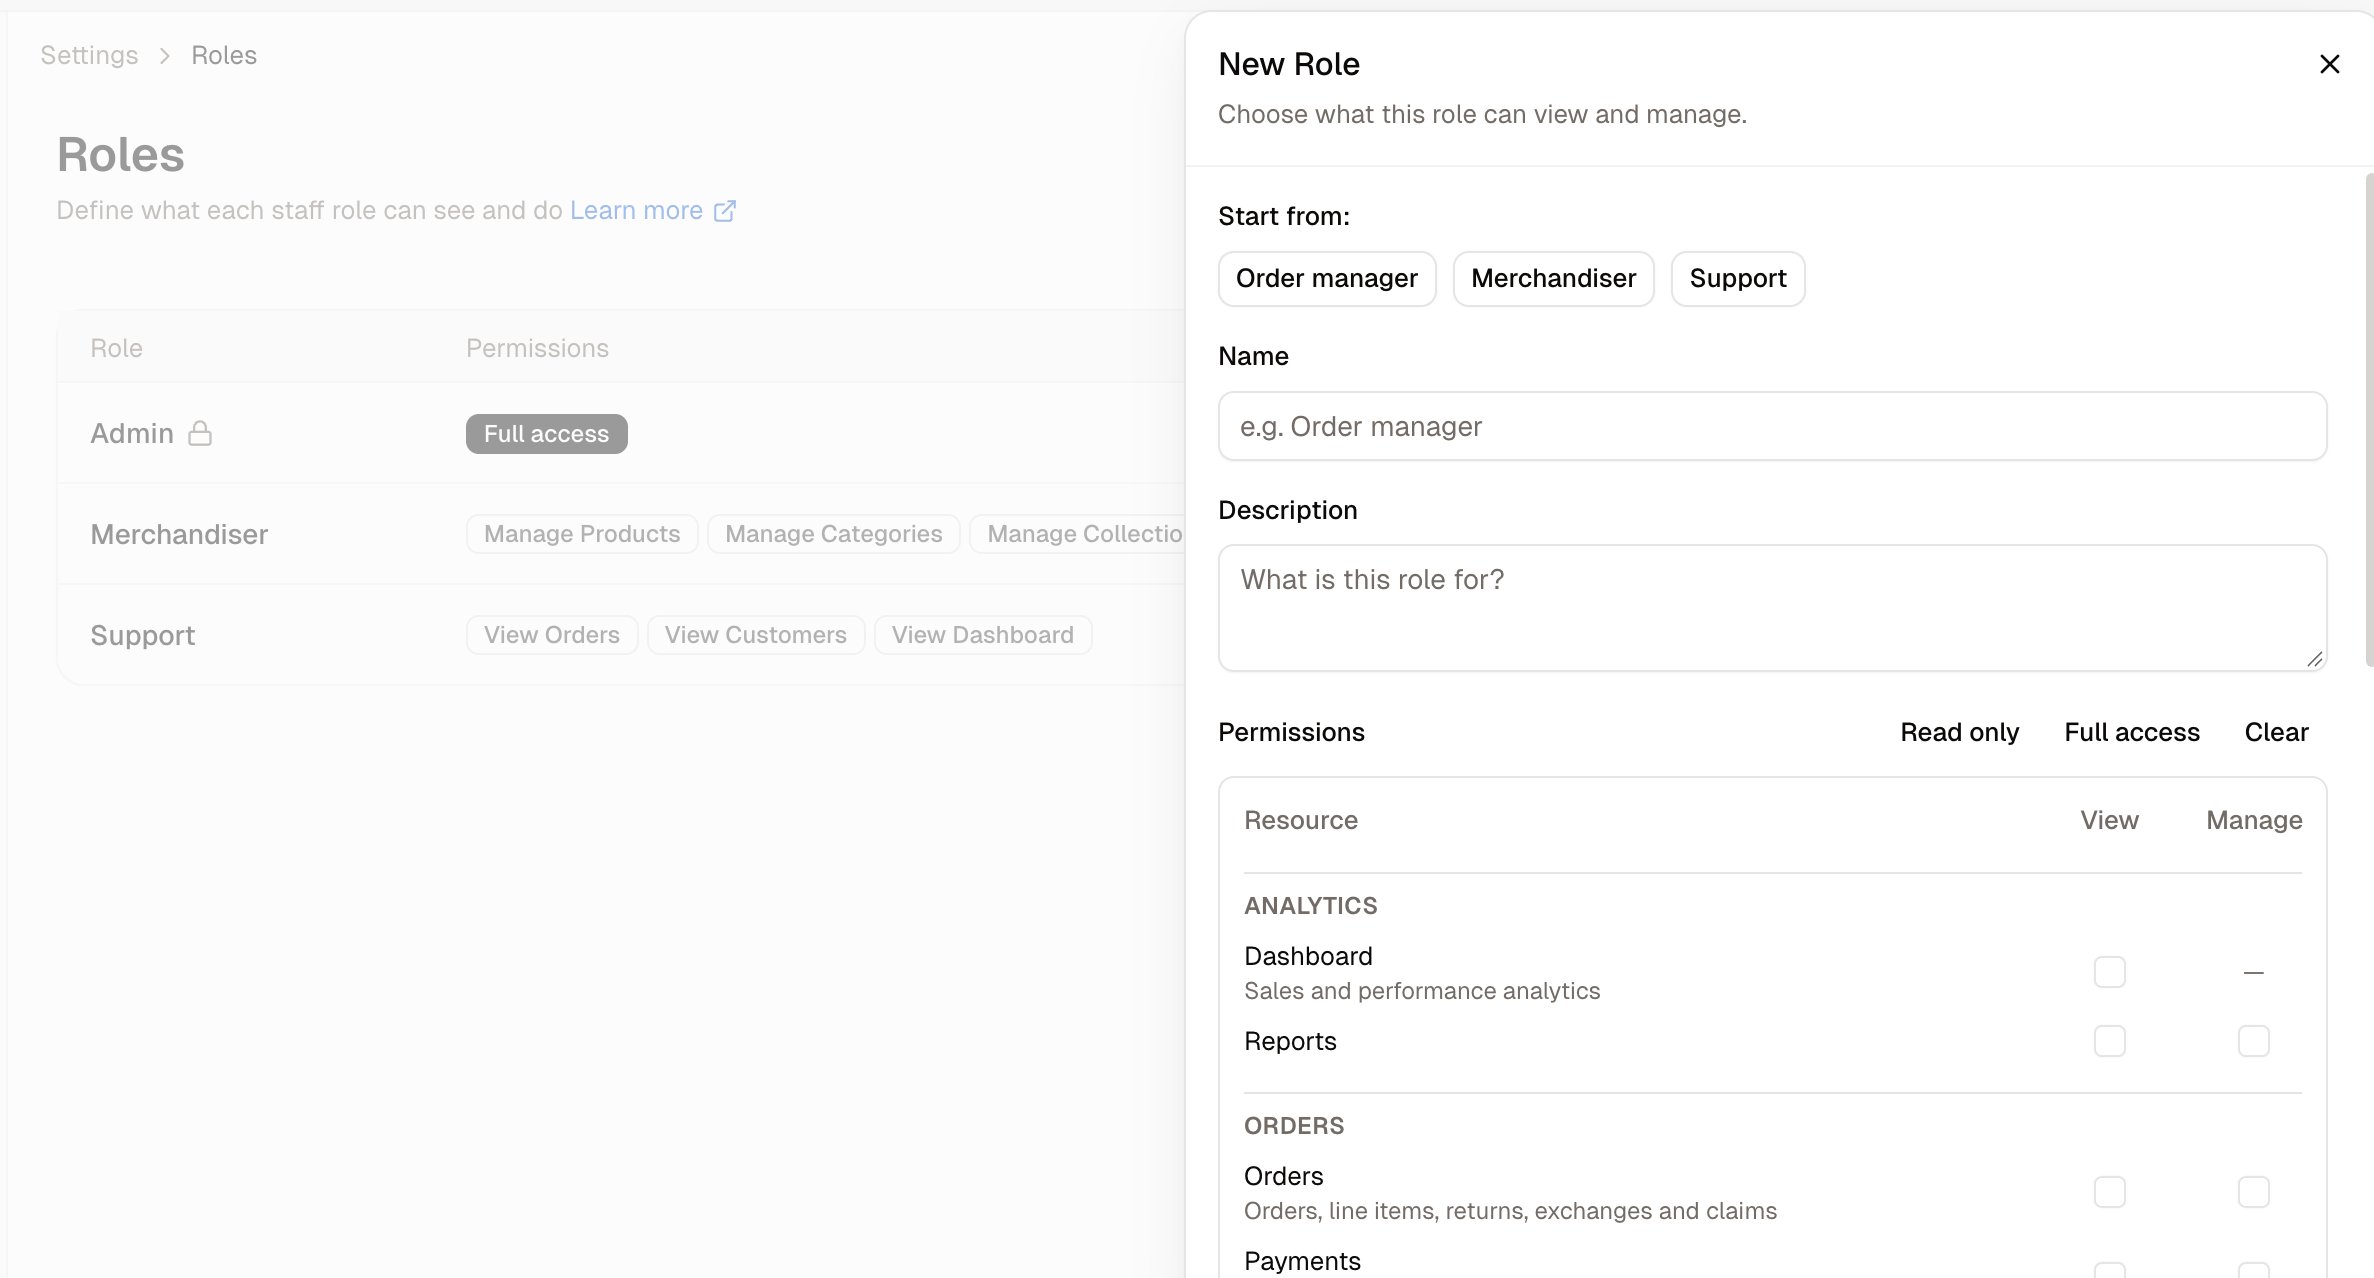 1. Optionally click one of the three **Start from** templates, **Order manager**, **Merchandiser** or **Support**, to fill the grid with a sensible starting set rather than an empty one.
2. Give the role a **Name**, and a **Description** if the name is not self-explanatory.
3. Set the permissions in the grid below.
4. Click **Save**.
The role is then offered when you [invite or edit a teammate](/docs/user/settings/staff).
### Setting permissions
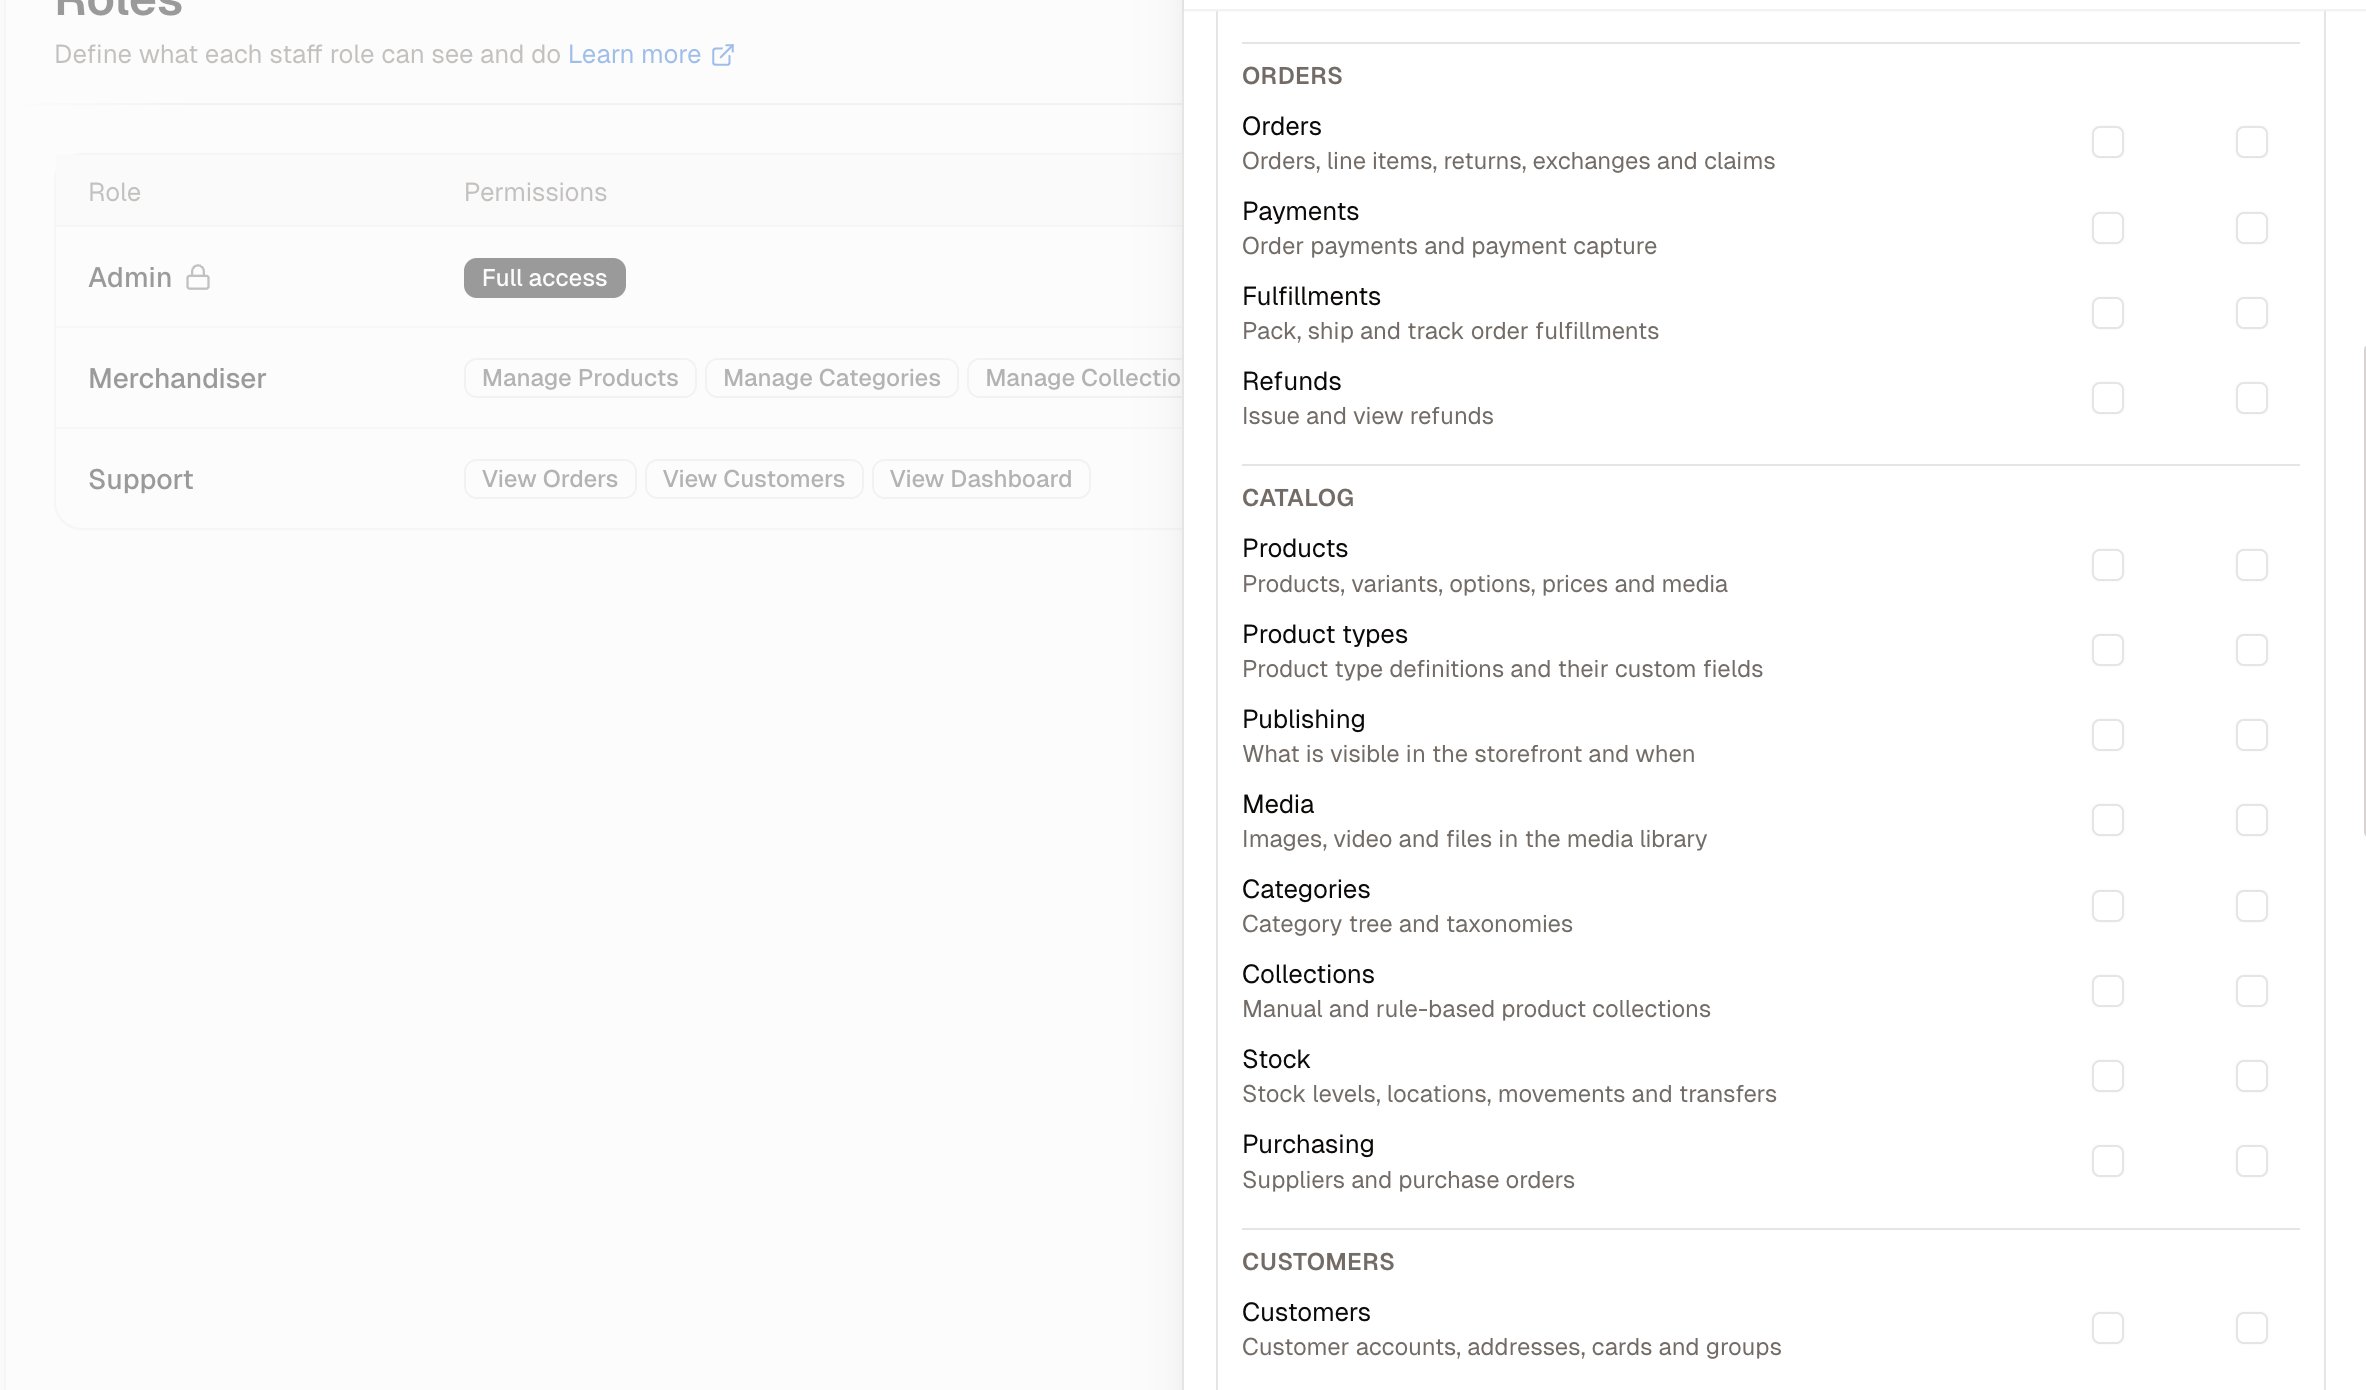
The grid has a row per resource and two tick boxes on each: **View** for being able to open it, **Manage** for being able to change it.
Three buttons above the grid set every row at once: **Read only**, **Full access** and **Clear**. Starting from one of these and adjusting is usually faster than working down 28 rows.
1. Optionally click one of the three **Start from** templates, **Order manager**, **Merchandiser** or **Support**, to fill the grid with a sensible starting set rather than an empty one.
2. Give the role a **Name**, and a **Description** if the name is not self-explanatory.
3. Set the permissions in the grid below.
4. Click **Save**.
The role is then offered when you [invite or edit a teammate](/docs/user/settings/staff).
### Setting permissions
The grid has a row per resource and two tick boxes on each: **View** for being able to open it, **Manage** for being able to change it.
Three buttons above the grid set every row at once: **Read only**, **Full access** and **Clear**. Starting from one of these and adjusting is usually faster than working down 28 rows.
 ### What you can grant
The grid holds 28 resources in 9 groups.
| Group | Resource | What it covers |
| - | - | - |
| **Analytics** | Dashboard | Sales and performance analytics |
| | Reports | Saved and built-in reports |
| **Orders** | Orders | Orders, line items, returns, exchanges and claims |
| | Payments | Order payments and payment capture |
| | Fulfillments | Pack, ship and track order fulfillments |
| | Refunds | Issue and view refunds |
| **Catalog** | Products | Products, variants, options, prices and media |
| | Product types | Product type definitions and their custom fields |
| | Publishing | What is visible in the storefront and when |
| | Media | Images, video and files in the media library |
| | Categories | Category tree and taxonomies |
| | Collections | Manual and rule-based product collections |
| | Stock | Stock levels, locations, movements and transfers |
| | Purchasing | Suppliers and purchase orders |
| **Customers** | Customers | Customer accounts, addresses, cards and groups |
| **Sellers** | Sellers | Seller accounts, onboarding and approval |
| | Commissions | Commission rates and what each seller is charged |
| | Payouts | Money paid out to sellers and its schedule |
| **Loyalty** | Gift cards | Gift cards and gift card batches |
| | Store credits | Customer store credit balances |
| **Marketing** | Promotions | Promotions, rules and coupon codes |
| **Settings** | Settings | Store, payment, delivery, tax and channel configuration |
| | Delivery methods | Shipping options, rates and the rules that gate them |
| | Package types | Boxes, cartons and pallets |
| | Webhooks | Webhook endpoints and deliveries |
| | Integrations | Provider credentials and connections |
| **Access** | API keys | Create and revoke API credentials |
| | Staff & roles | Team members, invitations, roles and their permissions |
**Dashboard** can be viewed but not managed, so it offers only one of the two tick boxes.
**Staff & roles** lets somebody change permissions, including their own. Grant **Manage** on it only to people you would trust with full access to everything, because they can give it to themselves.
## How to Edit a Role
Open the row actions and choose **Edit**, then adjust the grid and save.
Changes take effect for everybody holding that role, so narrowing a role narrows it for every member at once.
The built-in **Admin** role is protected and cannot be edited. To run a variation on it, create a new role and start from **Full access**.
## Further Reading
* [Staff](/docs/user/settings/staff) - The people you assign roles to
* [API Keys](/docs/user/settings/api-keys) - Access for applications rather than people
This documentation is built and hosted on [Mintlify](https://mintlify.com), a developer documentation platform.
### What you can grant
The grid holds 28 resources in 9 groups.
| Group | Resource | What it covers |
| - | - | - |
| **Analytics** | Dashboard | Sales and performance analytics |
| | Reports | Saved and built-in reports |
| **Orders** | Orders | Orders, line items, returns, exchanges and claims |
| | Payments | Order payments and payment capture |
| | Fulfillments | Pack, ship and track order fulfillments |
| | Refunds | Issue and view refunds |
| **Catalog** | Products | Products, variants, options, prices and media |
| | Product types | Product type definitions and their custom fields |
| | Publishing | What is visible in the storefront and when |
| | Media | Images, video and files in the media library |
| | Categories | Category tree and taxonomies |
| | Collections | Manual and rule-based product collections |
| | Stock | Stock levels, locations, movements and transfers |
| | Purchasing | Suppliers and purchase orders |
| **Customers** | Customers | Customer accounts, addresses, cards and groups |
| **Sellers** | Sellers | Seller accounts, onboarding and approval |
| | Commissions | Commission rates and what each seller is charged |
| | Payouts | Money paid out to sellers and its schedule |
| **Loyalty** | Gift cards | Gift cards and gift card batches |
| | Store credits | Customer store credit balances |
| **Marketing** | Promotions | Promotions, rules and coupon codes |
| **Settings** | Settings | Store, payment, delivery, tax and channel configuration |
| | Delivery methods | Shipping options, rates and the rules that gate them |
| | Package types | Boxes, cartons and pallets |
| | Webhooks | Webhook endpoints and deliveries |
| | Integrations | Provider credentials and connections |
| **Access** | API keys | Create and revoke API credentials |
| | Staff & roles | Team members, invitations, roles and their permissions |
**Dashboard** can be viewed but not managed, so it offers only one of the two tick boxes.
**Staff & roles** lets somebody change permissions, including their own. Grant **Manage** on it only to people you would trust with full access to everything, because they can give it to themselves.
## How to Edit a Role
Open the row actions and choose **Edit**, then adjust the grid and save.
Changes take effect for everybody holding that role, so narrowing a role narrows it for every member at once.
The built-in **Admin** role is protected and cannot be edited. To run a variation on it, create a new role and start from **Full access**.
## Further Reading
* [Staff](/docs/user/settings/staff) - The people you assign roles to
* [API Keys](/docs/user/settings/api-keys) - Access for applications rather than people
This documentation is built and hosted on [Mintlify](https://mintlify.com), a developer documentation platform.